DIY Headboard and Make-Believe Bed
Monday, October 31, 2011

You've probably seen photos and tutorials for DIY headboards on the web, but many of them don’t make sense for someone staging a home for sale.
Someone who's trying to save all the cash they can to pay for that down payment on the next house.
Someone who doesn't want to buy and then have to move or store bulky sheets of plywood or wooden frames.
Someone who has other things to do than spending all day hand-tufting a piece of pricey decorator fabric.
Someone who can't stand the thought of making holes to hang or stabilize a heavy headboard onto the newly painted walls. Does that sound like you?
Here is a hassle-free, DIY headboard you can make to stage a bedroom. You can make it from a fluffy blanket or a puffy quilt. I used a duvet with a large quilted pattern to make the grey headboard you see in this top photo. Even a sleeping bag is the right thickness.
What's so special?
This headboard starts with a sheet of foam core sheathing sold in the insulation aisle at home improvement centers. It’s lightweight and will cost about $10 for the half-inch thickness I used.
The faux fur throw was as wide as the queen size inflatable bed I used. It even had a subtle border that I was able to run across the top of the headboard. It was plush enough to soften the edges of the foam core panel. A thick covering like this means you don't have to bother with a layer of polyester batting or expensive foam. Easy!
The inflatable is my choice for staging an empty bedroom. It’s cheaper and more practical than investing in a box spring and mattress, and easier to deal with on moving day.

What you need
- One inflatable bed, and pump
- Four milk crates, of equal dimensions
- One 4- by 8-foot sheet foam core insulation
- Yardstick
- Ballpoint pen
- Utility knife
- One thick blanket, quilt, duvet, or fake fur throw
- Masking tape or duct tape

How to do
Blow up the inflatable, and put the head of it against one wall, where you want the bed to be. Set one milk crate about a foot inside each of the four corners of the bed.

“Dry fit” the foam core behind the bed to check the size.
I had already roughly trimmed with a utility knife my 4- by 8-foot piece to about the size I knew I wanted, adding a few extra inches.
Mark the width you want the headboard to be. It should be a little wider than the bed.
You can make rounded corners by tracing around a plate on the upper two corners.

Measure carefully so the headboard will sit squarely. My orange yardstick shows where I wanted to cut the panel. Mark the cut-off line with your pen.


Center the headboard on the blanket. If there is a large pattern to your blanket, or if it has a centered design, center the design.
If the fabric has an obvious up-and-down design (like letters or figures), be sure “up faces up.”
Place masking or duct tape at intervals all around. My blanket had stretch to it, so I used lots of pieces of tape to make sure it was stretching evenly. Re-check your front design.

Finish taping so all edges lie flat and are secure.
Duct tape is preferable if you plan to use the headboard long-term.
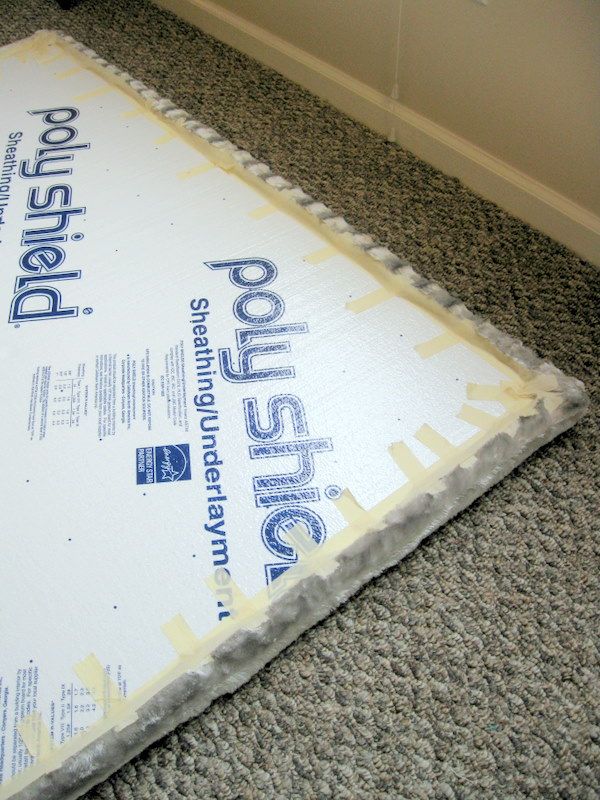

Your new headboard is complete. With the right bedding, you can create any look you want for staging your bedroom.

To hide the fact that the bed is an inflatable, you’ll need to make a bedskirt. Later this week, I’ll post my tutorial showing how to make the tailored bedskirt shown below, with box pleats at the corners and center. It calls for just three and a half yards of fabric -- fabric that you can use again another time. Like, after you have sold your house want to make curtains for your new home!
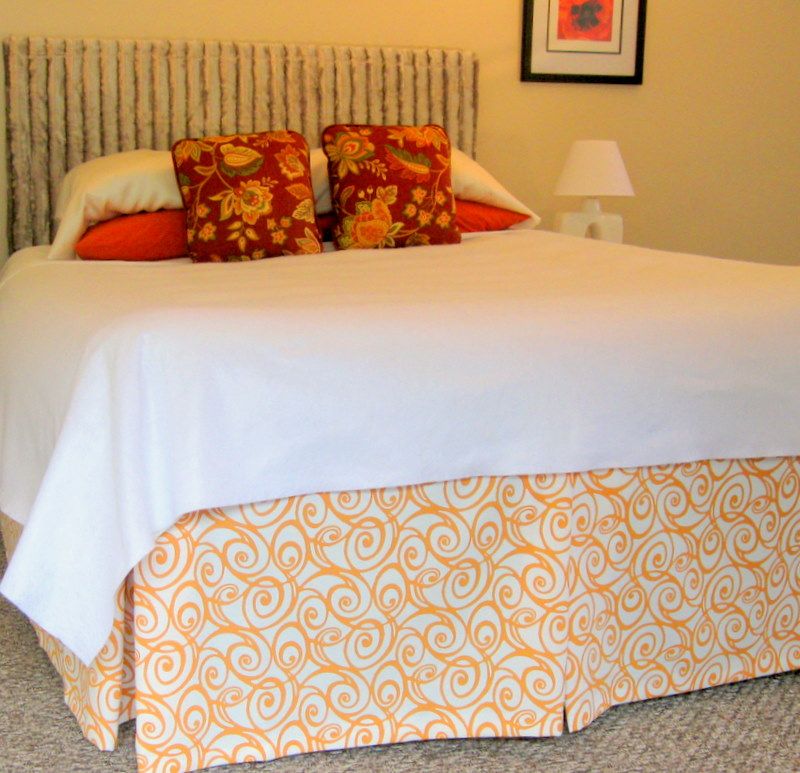
Bedrooms are often the first room buyers look at when they tour homes. An empty bedroom is a missed opportunity to showcase your home as a comfortable, accommodating, and special place, yet it can be the most economical room to stage. A beautifully made bed, a headboard, some art, some plants, a bedside table or two, and you're done!