An Easy Alternative to Empty Rooms - Virtual Staging

Sunday, October 31, 2010
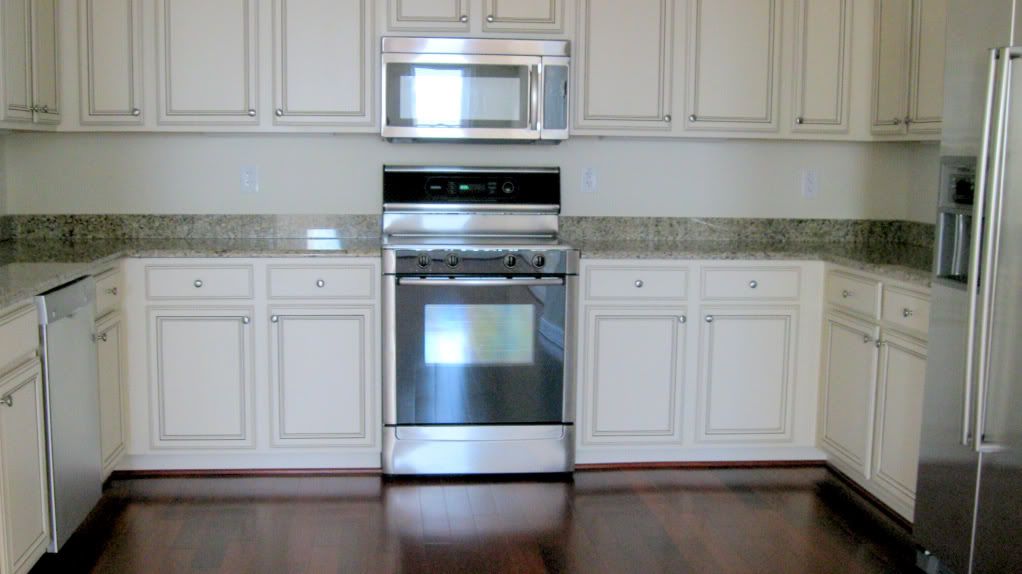
Photo: Halstead Property via The New York Times
An article in today's New York Times describes an alternative to actual staging -- using virtual furnishings to enhance photos for real estate listings.  There are plenty of interesting statistics in here to support the use of any kind of staging, but virtual staging is worth investigating, because it's so reasonably priced and simple.

http://www.nytimes.com/2010/10/31/realestate/31posting.html?emc=tnt&tntemail1=y

Here are the virtual staging companies that do the most convincing work.

http://virtuallystagingproperties.com/index.html 

http://virtualstagingsolutions.com/?gclid=CNbcqP-H_aQCFUmA5QodUGlGig

I write about the advantages and disadvantages of virtual staging in my eBook, DIY Home Staging Tips.  

9 Tips for Cleaning and Organizing a Closet

Monday, October 25, 2010
The irony of it -- a blogger who writes about decluttering, and her own utility closet looks like this. But what better way to get some clarity on an issue than by digging in and doing? My closet may not look all that nasty, but locating and retrieving necessities was getting difficult.

I knew there was junk in there that I didn't want or need anymore. So, the first thing I did was haul everything out of the closet. That was the easy part.

Organization comes easy to me, but throwing things out doesn't. I look at a collection of lamp parts and think, "Lamps are expensive. I could make or fix a lamp from these."

But, really, I should be thinking, "What chain of events would make me need these?"

Then, it becomes apparent that unless I really need another lamp (unlikely), or a valuable lamp needs a part (unlikely), or I have no money to go buy even a second-hand lamp (unlikely), I have no need for the lamp parts. 
And that is how I spent the next two hours.  

I now have room for my vacuum cleaner in the cleaning closet. Order has replaced chaos, and I was so pleased that I had to stop myself from going on to do another closet. Sort of. If someone like me who doesn't enjoy purging (I even hate the word) can toss things, you can too. Here are some pointers for making it a little easier to get a closet cleaned and organized.  

When I finished, I could find whatever I
needed and had room for everything.

Probe for clarity 

 Ask these questions of everything you take out of the closet. Do I like it? Do I need it? Would it be difficult to replace? The answer to at least one of these questions should be, "Yes." Ideally, the answer to all three would be, "Yes!" 

Motivate yourself

Tackle this project when you are feeling clear-headed and energetic, but not necessarily happy.  Being a little annoyed at your clutter makes getting rid of it easier. Don't get sentimental or nostalgic, as these emotions will slow you down and cloud your rationality. Just keep envisioning how righteous your closet will look and how well it will function for you. And how impressed house hunters will be. Yes, impressed, because most people have messes in hidden places, and you won't.

Adopt a strategy

Give yourself room.You may have to clear a space outside the closet as a landing platform. A big bed nearby is a boon. I had to spread my closet contents out along the adjacent hallway, but it worked fine. Keeping a wastebasket or garbage bag handy saves steps.

Did I need all these lamp and electrical parts?

Decide on a reward 

Promise yourself something you like once you're done. I told myself I could have a blueberry yogurt smoothie. Staying hungry helped move the project along. What's your perk?

Name some categories

I found it efficient to sort as I emptied. I clustered cleaning supplies, vacuum cleaner accessories, batteries, candles, picture hanging supplies, tools, and so forth, as I took them off the shelves.

Consolidate belogings

I discovered I had three separate spray bottles of window cleaner, and that all the liquid fit into just one bottle. Cleaning cloths were in three different places, leftover hinges and cabinet knobs were hither and thither, and lamp parts were everywhere.

Relocate some items

Whenever I came upon an item that belonged in another place, I took it there, including a pile in the living room for my favorite charity second-hand store. I knew I risked distraction by "leaving the work site," but dealing with strays kept the area around me from getting too congested. "Focus. focus," I told myself.
I didn't need to purchase fancy containers and accessories.
I just used what I had. Contents are obvious, so labels aren't necessary.

Confide in another person

You can create your own accountability factor, even a contrived one like I did. I knew I'd be blogging about my closet re-set. I had someone to impress: you, my reader. I didn't want to look like a slob blogger. Maybe you have an open house coming up that could serve as your accountability push.

Enjoy your discoveries 

You're bound to unearth some treasures. My favorite tiny screwdriver that I thought I'd lost showed up. A box of Magic Erasers I didn't know I had was hidden under a bag of sponges. A generous stash of grocery bags that we need for when we, ahem, walk our beagle, occupied a back corner. Enough old hinges, cabinet knobs, and lamp parts (pat on back!) manifested to net me enough cash from the scrap metal place to take a friend and myself to lunch.

When house hunters tour homes on the market, they usually look in closets. Closets are important to buyers, and a tidy closet speaks well of you and your staged home. So, dig in! The hardest part is getting started. Honest.

Get the  look, get the book

For more encouraging tips and techniques that make house staging easy, download my eBook, DIY HomestagingTips to Sell Your Home Fast and for Top Dollar. 


Q: When do you remove your staging furniture and props?

Thursday, October 21, 2010
Even though we've had a signed offer and a binding contract on the condo we staged five months ago, we didn't remove any of our precious fluffing until we were almost ready to close. Why wait so long? Two reasons.

Surprises happen

Until you leave the closing table, the deal isn't done. Sometimes snags and glitches appear at the last minute. Someone gets sick. Or dies. The bank's papers don't arrive. There's a last-minute question about an easement, a will, a lien, a signature.

Whenever real estate changes hands, there are plenty of t's to cross and i's to dot.

If the deal does fall through for some crazy reason, and you have to relist the property, the staging is in place, ready to show. This event is rare, but why take a chance?

Mr. Lucky and I waited, and then spent a few hours the day before our closing on Tuesday, carrying couches, tables, chairs, lamps, and everything else out of the condo. Everything. You don't want to do that all over again, in reverse, the next day.

Staging continues to work for you

The other reason staging should stay is you want your staging working its magic when inspections are done. The buyer of our condo hired a home inspector, and the bank hired an appraiser.

Both these people, on different days, went over the unit looking for problems. It's nice to think that they are objective professionals, filling in blanks, checking off boxes on forms, and multiplying numbers to determine things like square footage, cost per square foot, and bottom-line worth.

But, you know what?

These people can't help but be influenced by how clean a property looks, feels, and smells. Even experts form subjective opinions as they methodically observe and calculate data. Ms. Speedy told us this was true, and other Realtors have told us the same thing. Leave the staging up until all inspectors have come, poked around, and gone.

We loaded our van five times to reclaim the staging furniture 
and props we used to stage the condo we just sold.

Staging serves multiple purposes

Knowing that nuts and bolts people like appraisers and home inspectors are influenced by staging affirms my belief in the value of staging a home on the market.

Even the numbers people can't ignore the value of freshly painted walls, shampooed carpeting, handsome furniture, uncluttered surroundings, and beautiful props.

That's why it surprises me that more homes aren't staged.

Even the big boys miss the point sometimes.  A Realtor friend arranged a tour for me of some luxury condos in our town. These units have been for sale for over a year, and they are all very nice. Yet, the builder has had to reduce the prices gradually until now they are about 40% less than they initially were.

Sure the economy is the problem, but isn't that one more reason to stage?  I expected to see at least one model unit furnished, but no. Hello?

The sellers couldn't find a vase of silk flowers, 
a bowl of some faux lemons, or a colorful teapot 
to liven up this kitchen in what's billed as a luxury condo?  

I'm convinced that our simple staging helped sell our condo. Comparable units in the same complex are still waiting for a buyer.

In fact, for the past month, our Realtor has marched clients past our Sale Pending sign and through our unit after they have walked away from the other units, so they could see "what can be done."

Most people want to move right into their new home. They don't want no stinkin' repairs!

We get to celebrate

To celebrate the closing of our property, Mr. Lucky and I went out to dinner. Together we enjoyed a local favorite -- Low Country steamed seafood -- clams, crab, shrimp, corn, potatoes, and sausage.  What's not to love?

If you are on the fence about staging the home you are selling, I hope I've helped you see the value staging has. My eBook, DIY Home Staging Tips to Sell Your Home Fast and For Top Dollar, tells you how to do it yourself so you don't have to hire a home stager.   

Getting Buyers to View Your Home

Monday, October 18, 2010
With so many houses on the market, how can you guarantee your buyer will find you?

Buyers do searches of listings and then narrow down the list of homes they want to see.

Don't count on luck to get you on the list. Instead, stage your home, and then advertise it right.

Do your homework

Once your home is listed check your listing. Check it for mistakes and omissions. 

It's very common for a garage, basement, attic, bonus room or outbuilding to be listed incorrectly or not at all. 

Are the specifications right regarding important features like square footage, heating and cooling, septic, school district, size of rooms, taxes, roof, and flooring? Check even the obvious data like numbers of baths and bedrooms.

No one is perfect, and all these details are just entered into a computer, maybe by someone who hasn't had her second cup of coffee yet.

Check your photos 

The photos that accompany your listing should do justice to your staging. Otherwise, replace them.

Hiring a professional photographer is a great investment. If you can't afford a professional try to work with a  listing agent who makes pro photos part of her package. Some Realtors will take photos, and some do a good enough job. If you have to shoot your own, make sure to edit them. Straighten them, crop them and use any other photo editing skills you have.

Make sure any published pictures were taken after all the staging is in place. 

And once your home is staged and photographed, don't disappoint buyers when they come calling and find furniture re-arranged and rooms cluttered. Changes like this will breed distrust.

Choose the best angle or two or three or four for each room, then shoot multiple pictures, tweaking the angle of the camera and other minor variables, so you can later eliminate all but the very best.

Bad photos are often taken from a poor vantage point, or were not cropped and edited for brightness and contrast, resulting in drab and uninteresting images that tell buyers nothing.

For some how-not-to-photograph-your-home tips, visit http://badmlsphotos.com/ . And be prepared to be aghast.

Important top shot

Especially crucial is the profile feature photo that headlines your listing. House hunters make quick decisions based on that one image.

Is the angle flattering? Is the time of day right, so the home's details are evident and not lost in shadows? If you are the photograher, take lots of pictures from close, far and in between, and then choose the best one.

And, please, let's get the cars and garbage cans out of the driveway when we're taking that all-important shot.

Details make a difference

If it's empty, you've
lost prospects. 
Review the write-up and any handouts your Realtor or you have prepared. Make sure there are no mistakes or typos there. When your literature looks sloppy, your home loses credibility and desirability.

Do you have a weatherproof holder of print-outs available for drive-by house hunters? Keep it full. It's a simple thing, but important.

If you change your price, make sure the literature tells people that.

Don't be shy about attaching a second sheet that lists all the amenities an MLS sheet may not mention -- how close the golf course is, the way the local schools are rated, town demographics, number of restaurants within walking distance, nearby hiking trails, public transportation, climate data, whatever makes your property look more valuable.

Always remember that some buyers will be people relocating from elsewhere. Do they know the local abbreviations and lingo? Don't assume everyone knows all about your area's best features. You may have to explain the local real estate jargon and abbreviations. 

Get the look, get the book

Staging your own home is a great beginning, but part two is making sure people get to see the beautiful job you've done to showcase your home.

The best beginning for staging your home is my eBook, DIY Home Staging Tips to Sell Your Home Fast and for Top Dollar. And you can download it right now

Ins and Outs of Staging a Fireplace Mantel

Thursday, October 14, 2010

When the home you are staging has a fireplace, its mantel gives you a perfect opportunity to call attention to this feature.

Whether it's wood-burning, gas logs, non-functioning, electric, or just decorative, a fireplace is usually a room's main focal point.

Having such an inviting focal point makes your staging work easier. Put some stuff on the mantel and you're done.

Wait. Not so fast. What stuff? 

Mantel basics

Choose the wrong accessorizing props and you've missed an opportunity to enhance the room's selling point. Arrange them poorly and you've ruined the relaxing effect a fireplace has on a room.

In my eBookDIY Home Staging Tips to Sell Your Home Fast and for Top Dollar, I offer five different formulas and plenty of do's and don'ts that will make easy work of decorating even a problem mantel.

Decorate the mantel in the same decor style you've staged the rest of your house. If your home has an open floor plan, wall to wall carpet, recessed ceiling lights, and casual furnishings, choose objects for the mantel that are modern, fun, and informal.If your home has high ceilings, crown molding, hardwood floors, chandeliers, and a formal dining room, choose objects that are traditional, historically interesting, and sophisticated. Be selective, because you need only a few things.


This fireplace is slightly off-center, so its 
mantel was decorated asymmetrically, 
and with an odd number of items.
Decorators use what they call the Rule of One and Three. Their advice is to choose one large or tall item and balance it with three small but somehow related items. Maybe you have a centerpiece between them, or the four things may be the whole show.

That rule works fine for informal mantel groupings, but not so much for that formally balanced mantel. There, you'll want one side to look just like the other. If you have pairs of identical vases, candlesticks, picture frames or obelisks, set one of a pair on each end of the mantel.

For less formality, keep the pairs together and balance the mantel asymmetrically. Stand back and squint, and you should be able to tell if the mantel balances.
Sometimes what you place on your hearth balances what
you arrange on the mantel. Photo: Michelle Janeen


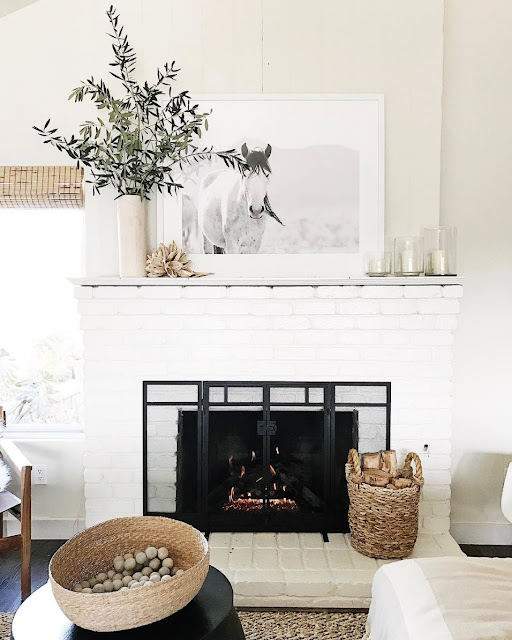
Just a couple of dramatic items are all it took 
to accent the beauty of this contemporary style fireplace.

A cozy home with cottage-style furnishings deserves 
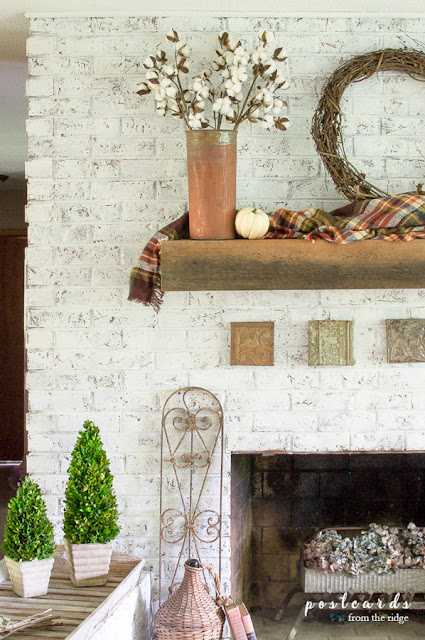
a mantel dressed in nature-themed objects.

Choose your props carefully

Pick mantle props that have varying colors, textures, shapes and sizes. Just as you've done with the rest of your staged house, stay away from small stuff and go for big, clean shapes. That doesn't mean you can't use found objects from nature. Branches, pinecones, shells, rocks, feathers, and driftwood can be wonderful mantel props.

Stagger the props to create a fluid motion as your eye moves from left to right, the way a buyer would glance over a mantel. Vary the heights just enough to make it interesting, but not so much that your eye jumps around.

I'm a believer in the fooling-around approach to accessorizing. Experiment with what you have on hand, and you're bound to discover the perfect arrangement. Every staged house for sale with a fireplace deserves some thoughtful attention to its mantel. I hope you'll be inspired by these photos to create your own mantel masterpiece.

Top photo: PostcardsFromTheRidge

Painted Furniture -- Home Staging's Friend

Monday, October 11, 2010

Home stagers on a budget -- celebrate with me, because painted furniture is the new look.

The design world has given us permission to paint those pine armoirs, those oak tables, and even those (gasp!) mahogany china cabinets.

What we get 

Let's look at what we gain when we put some paint on the furniture we're using for home staging.

Paint gives us unlimited color choices.

Paint disguises damaged, flawed furniture, saving us money.

Paint adds a clean, fresh look to our rooms.

Today's trend-conscious singles and young families relate to the informal, laid back look painted furniture creates.

Other buyers in all demographics respond well to the pretty-factor of painted furniture. They know they aren't buying furniture, but you and I know they are influenced by furniture.

What to paint

Don't worry, antique hunters and lovers of stained wood, we won't destroy anything valuable.

We're staging with garage sale finds, not precious heirlooms. If what you're thinking of painting is 150 years old, belonged to your grandmother, or cost you more than a day's wages, don't.

Otherwise, get on your painting clothes.

You do have painting clothes. don't you?

Painted furniture is a favorite of Kate
at CentsationalStyle.
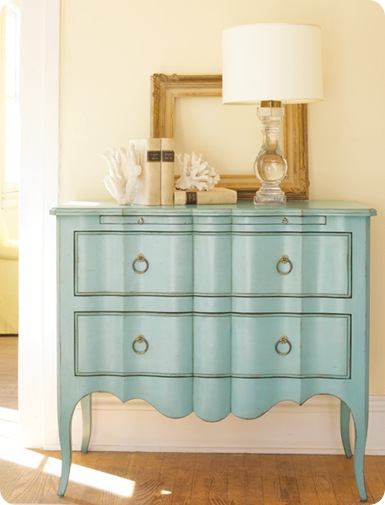
 Just look at this fabulous dresser
she gave a fresh coat of paint. 
  http://www.centsationalgirl.com/tag/painted/
Kristi at Pink and Polka Dot,
the slipcover queen,
 painted a thrist store table white
to match her chairs.
 http://pinkandpolkadot.blogspot.com/

If you're still nervous about covering up natural-looking wood, remember that paint can be taken off furniture.  If you change your mind and need some stained wood furniture in a few years -- like for a man cave -- you can hand him the can of Strip-eeze.

What Colors 

Choose colors that are going to work with you in your staged home as well as your next home, neutrals like white, black or cream. For a little more personality, pale or mid-range grey, blue, or green are good choices.

Of course you'll tie your color to other colors in the room. If there are naturally finished wood pieces in the room, choose colors that are noticeably different. You do not want to look like you are imitating wood.  With a few painted pieces of furniture in the room, the wood pieces will look all the more glamorous. Trust me.

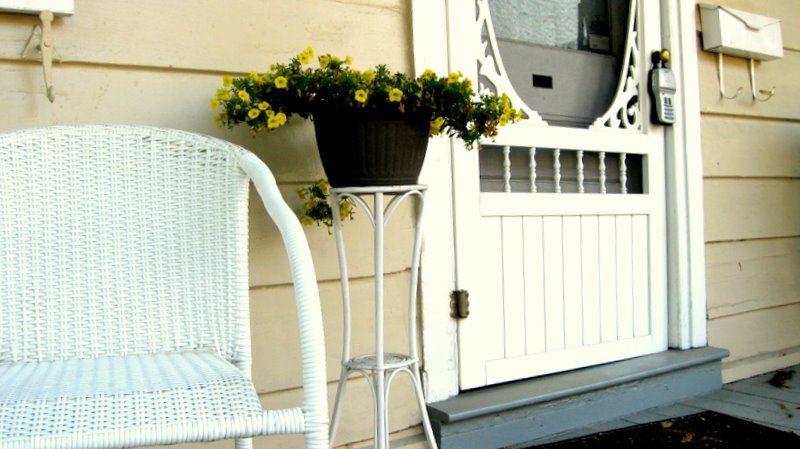
Wicker furniture is always charming.
Here, these two wicker pieces make
a good first impression because they are
freshly painted. Painting wicker
is usually a spray paint project.

What finish

The finish you choose will depend on the style of the piece and the mood of your home. A high gloss sheen looks super on contemporary pieces, and in some formal settings, but furniture surfaces better be in good condition and well-prepped, because every pimple will show. You're safer with a semi-gloss or egg-shell finish.

What's first

Give yourself plenty of room for working on your piece, and good ventilation. Sand the piece well, using fine sandpaper. If it's a dresser, remove hardware and drawers. Go over the entire thing with a tack cloth to pick up dust. Prime with a stain-blocking primer like Zinsser Bullseye or Kilz. Water base primer and water base paints are the way to go.

Use a small roller or a good quality brush and keep checking your work for drips and runs. If you are painting a table or chair, start with it upside down first, and when the legs are done, flip it over to do the top.

If your project piece is small, it's probably easier to spray paint it. You won't have quite as many colors to choose from, and you need even better ventilation.

When the primer is dry, sand it lightly, and apply your first coat of color. Plan on three thin coats for a smooth finish that hides brush marks.  Sand lightly and tack off between coats.  Allow to dry for a full day before moving or adding hardware.
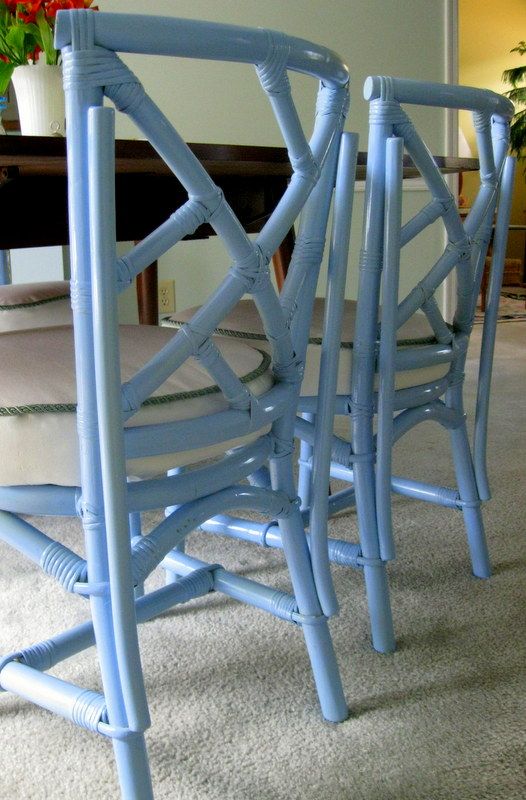
A coat of pale blue paint covered up the dings and
scratches in my old bamboo dining chairs. 

What style

It's common to buy painted furniture with slight distressing or other antiquing techniques.

Although aging furniture this way does add some warmth and character, I generally don't recommend furniture that smacks of shabby chic for staging. I love the look, but not everyone does, especially men buyers and people unfamiliar with the style.

So, give your staged home a new feeling. Paint some furniture, and you'll see what a welcoming air it creates.

Get the look, get the book

You can find solutions to other budget, decorating, and furniture problems in my eBook, DIY Home Staging Tips to Sell Your Home Fast and for Top Dollar. You can download it NOW and start creating the home that everyone wants.


Top photo: TheNester


Never-Fail Color Scheme: Blue and White

Thursday, October 07, 2010
Does your home staging project start with empty rooms?

It can be scary when you start with zero ideas and furnishings.

Selecting a color scheme can get the ball rolling.

One safe default color combo is blue and white together. You can't go wrong with this duo.

There's something unique and fascinating about blue and white. Unlike other colors, all blues go together.

And that means decorating mistakes are difficult to make.

The magic of the classic combo

The color consultants might jump all over me, but I adore a mix of blues -- royal, cobalt, indigo, azure, iris, cornflower, baby blue, navy...they're all good. Any blue and white color scheme is perfect for decorating any room, whether it's a kitchen, bedroom, bathroom or porch. And that means it could be your go-to color combo to help stage your entire home.

I never tire of blue and white combinations in homes, and neither do most people. It's classic, but always on trend, and it's clean but never sterile.

Add some blue and white transferware plates to a wall, and you've got yourself some instant classiness. Add white towels with bold blue stripes and your bathroom will sing. Add a pale blue and white dhurrie rug to a hallway, and you've upped the charm factor. Add a blue and white toile duvet and curtains in a bedroom, and well, you're home free.

You can find pretty bowls likes this at most
import stores. 
Photo:static.guim.com 

Without this blue rug, the room's furniture 
would be adrift. Photo: Canadian house and home 
via thirteen and south.blogspot. 

Getting art and getting inspired

Did you know that you can visit www.art.com and order artwork by color? Choose the size, style, content (landscape, abstract, whatever), and up pops all the choices!

If you want to get inspired in the blue and white vein, be sure to look at Carolyne Roehm's book, A Passion For Blue and White, at bookstores and available from Amazon for about $40.  If you're not a believer in the beauty of this color marriage-made-in-heaven, you will be when you've spent time with this gorgeous coffee table volume.  Even though it was published years ago, the prices for used editions are the same as new, further proof that this beautiful book is worth owning.

Get the look, get the book

Wherever you are in your homestaging project, a safe color scheme is a perfect starting point or finishing touch. Do your staged rooms need a little more life? Just inject some blue and white accessories, and you'll provide all the energy they need.

You've no excuse for being unable to choose a foolproof color scheme for staging your home when easy, abundant, economical sources for blue and white furnishings are available.

And for more advice about how to stage a mantel, tabletops, bathrooms, closets, bedrooms, kitchens, and even the front porch, download my eBook, DIY Home Staging Tips to Sell Your Home Fast and for Top Dollar.


Where to Stash Un-Sexy Stuff in a Staged Home

Monday, October 04, 2010
"Do I have to hide my toothbrush?"

"What can I do about wet towels when I leave in the morning?"

"I can't ask the kids to not play with their toys."

"Who hid the remote?" 

"Put the lid down when you're done."

"Nobody lives like this!" 

Sound familiar?

These are the kinds of things people living in staged homes utter. Are you one of them? Are you taking it in stride, enjoying an uncluttered, clean, and prettied home? Or do you hate having to keep your closets and counters picture-perfect?     

I want you to love your staged home and enjoy living there. Maybe the following tips will help. They come from my own experience and from people who have lived in staged homes, waiting for the days when they can leave their beds unmade once in a while. 

Under the bed

When prospective buyers tour your home they will open cabinets and closets. But under beds is one of the few places they won't look. Slide some oversized, lidded, plastic storage boxes under there to hold magazines, hobbies, and other ordinary things that don't need to be on view.

Opaque containers 

Box up the little s
tuff.  Rather than having stacks of tee shirts, socks, bras, scarves, or purses on closet shelves, line up some matching baskets or boxes and fill them up. Your closet or cabinets will look so much neater. And it's still easy for you to find and replace things.

Car trunk

There's always room in your vehicle to throw last-minute clutter when your Realtor calls and asks if she can bring some buyers over. Most likely that trunk is roomy enough to accommodate a couple baskets of unfolded laundry.

Dresser

Rearrange your dresser drawers so that one of them is empty. You can throw the non-glamorous things into it every day before you leave the house.

You can also use your dryer or washer to temporarily stash what you don't want visible. 

Routinize

Get some routines going. Polish the faucet when you brush your teeth. Dry down the shower stall with a microfiber cloth when you're done showering. Store your magazines under the couch cushions. Get in the habit of putting the toilet seat and lid down. These tidy-up habits will make short-notice showings stress-free. 

Cover up and hide

It's best if your 
hampers, wastebaskets, and recycle bins have lids or are tucked away in unseen places. You can always toss a towel over a basket of laundry. People often look under the kitchen sink to see if it leaks, so that's not a good hiding place unless you store things in opaque boxes. I like top shelves in closets for putting private possessions out of sight and out of reach.        

Happily living in your staged home takes some forethought. But you can do this! Remind yourself that staged homes sell faster for more money. Repeat.

Get the look, get the book

Read more about the problems that home sellers face, such as old furniture, no budget, no time, mismatched furniture, and an uncooperative spouse! I offer helpful advice for all these situations and others, in my eBook, DIY Home Staging Tips to Sell Your Home Fast and for Top Dollar.

Popular Posts