

That means no heavy draperies or sun-blocking shades. There are plenty of possibilities – from lightweight curtains and sheer drapes to pull-backs and Roman shades.
Problem view?
But what's a stager to do when there’s a view from the window that doesn’t exactly help sell the property? Neighbors with ugly yards, a factory, the back of an apartment building, a busy road, or a construction site are all common problems.
No one can make these things disappear, but a clever stager can minimize the impact by helping buyers forget the problem. Enter curtains that let in light but hide the view.
Easy solution
Here is my spin café curtains that are DIY-friendly, even to someone with no sewing skills. The lower portion can be kept closed to conceal some outdoor unsightliness, and the top can be kept open, hopefully revealing blue skies, mature trees, or a distant view.
What I like about these cafe curtains is that they are reminiscent of a natural sisal rug bound in black, or a traditional woven reed tatami mat used for flooring in Japan. The way I see it, anything classic in a staged home is a bonus.
The mats I chose to work with can be purchased dirt cheap in summer by the beach. Amazon sells them all year long for about $6 each. They are called beach mats, picnic mats or yoga mats, and they measure about 3 feet by 6 feet.
What you need
2 straw beach mats
Yardstick
Pencil
Scissors
Grosgrain ribbon to edge the mats, 7/8 inch wide, about 6 yards for each mat used
Grosgrain ribbon to make loops, 3/8 inch wide, about 2 yards for each mat used
Hot glue gun and glue sticks
Dressmakers straight pins or masking tape
Dressmakers marking pencil or chalk
Having a table large enough to accommodate the length of the curtain helps. It doesn’t need to be big enough to lay out the whole mat, because the mat folds over easily. Protect your work surface from hot glue drips if necessary.
Install hardware
If you do not have curtain rods installed, do that first. I used spring tension rods that sit inside the window frame. I chose black because I liked the way it looked with the black ribbon loops. The curtain rods, top and bottom should match.Measure for the curtain
Measure the distance from the top of the curtain rod to where you want the curtain to end. The lower curtain should end at the window sill. The upper curtain should end just below the lower curtain rod. That figure minus one inch is your curtain length. If your window has an upper and lower sash, both curtains will probably be the same length because the rod will fall in the middle.Cut the mat
First you'll divide the mat in two. Heat up your glue gun because you’ll need it as soon as you cut the mat in half. If there are cloth ties on the end to tie the mat as a roll, cut them off. Fold the mat in half crosswise. With scissors, cut on the fold. The mat will want to unravel, so run a bead of glue down the edge to seal the stitches that have come loose. Don't worry if you lose a long reed or two. You may have to scrunch some of the reeds back in place and stick them down with glue. The ribbon will cover your glue repair.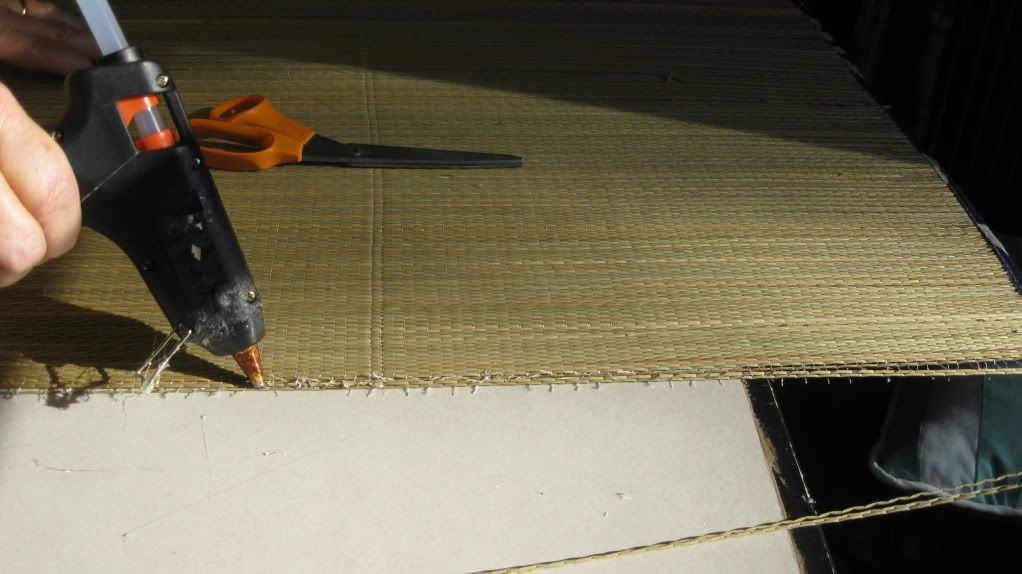 |
| Glue the edge to prevent unraveling. |
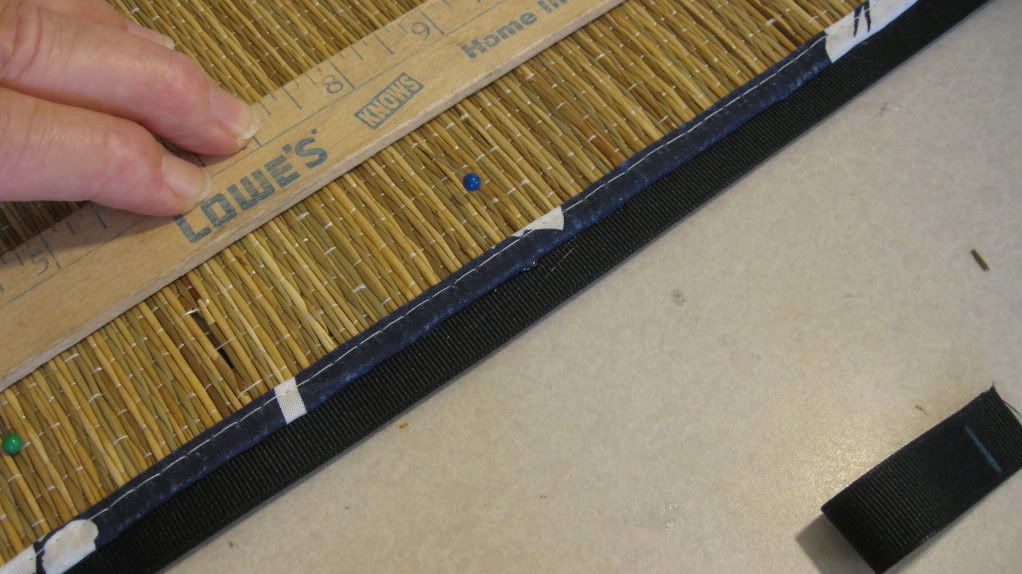
If your upper and lower curtains are different lengths, decide if you are making the upper or lower first. With a pencil, measure and then mark the length on one of your grass mat panels. Draw a line across the width of the panel to the correct length, and with scissors cut on this line. Going in this direction, across the reeds, the mat does not unravel.
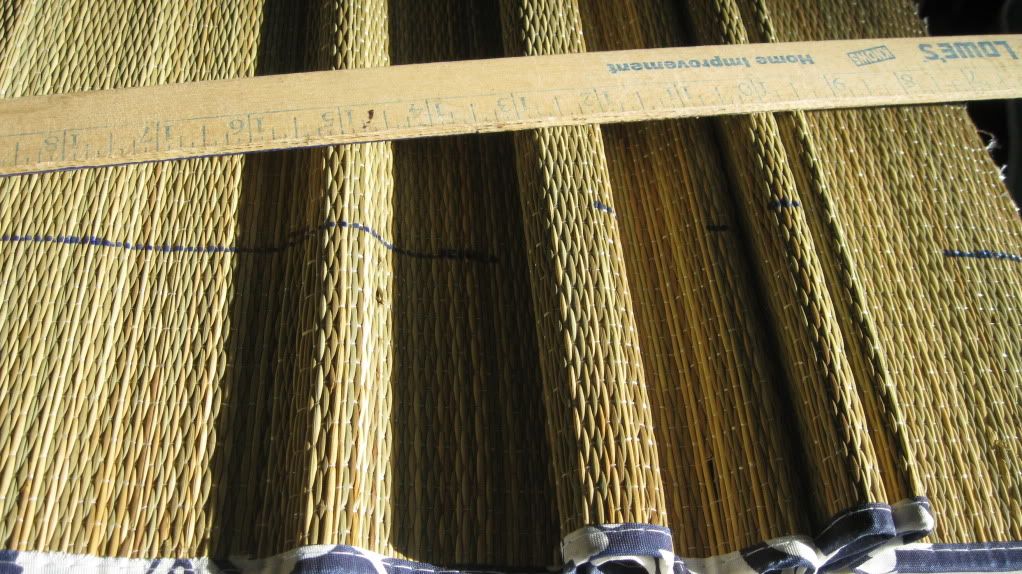 |
| Measure the right curtain length and draw a line. |
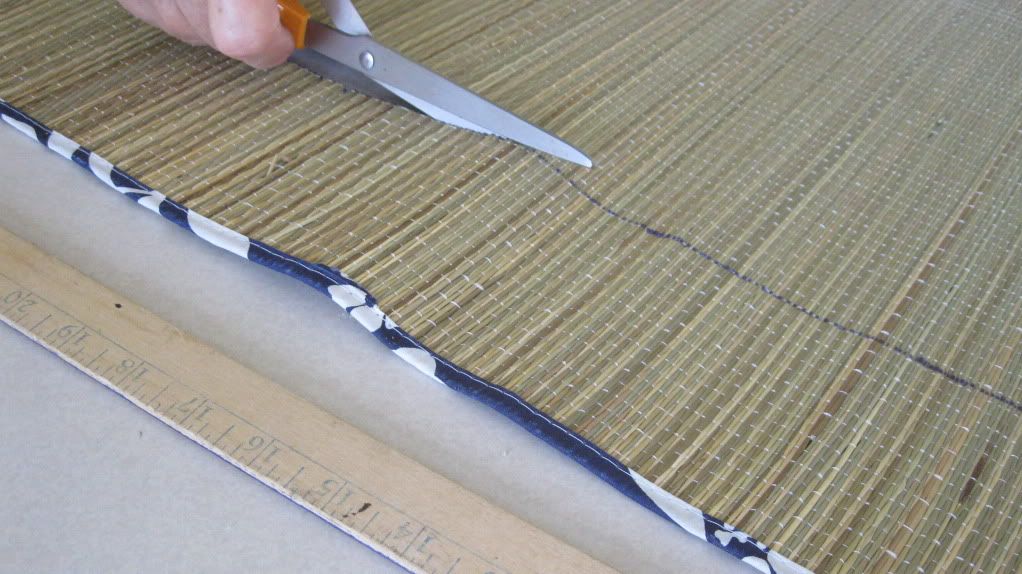 |
| Cut on the line to shorten the curtain. |
Attach ribbon
Lay the mat right side up (both sides are probably the same, but one side may look better) on your work table. Lay a length of 7/8-inch ribbon along the edge that will be the length of the curtain. Cut the ribbon the length of the curtain, plus an inch on each end. You might as well cut the ribbon for the other edge at the same time. My curtain panels were 25 ½ inches long. So I cut two lengths of ribbon 27 1/2 inches long.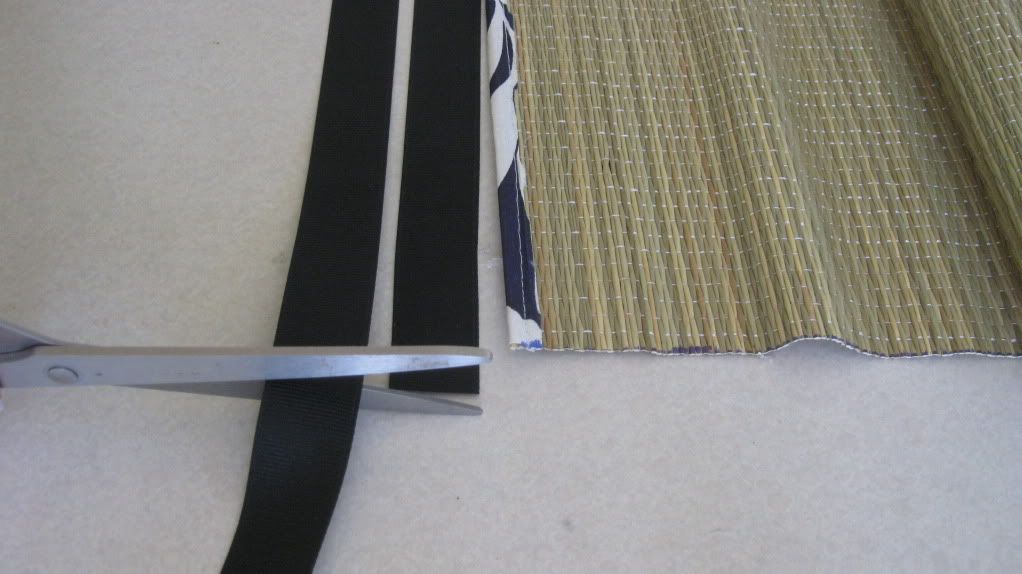 |
| Cut ribbon longer than the curtain. |
Glue ribbon onto edges
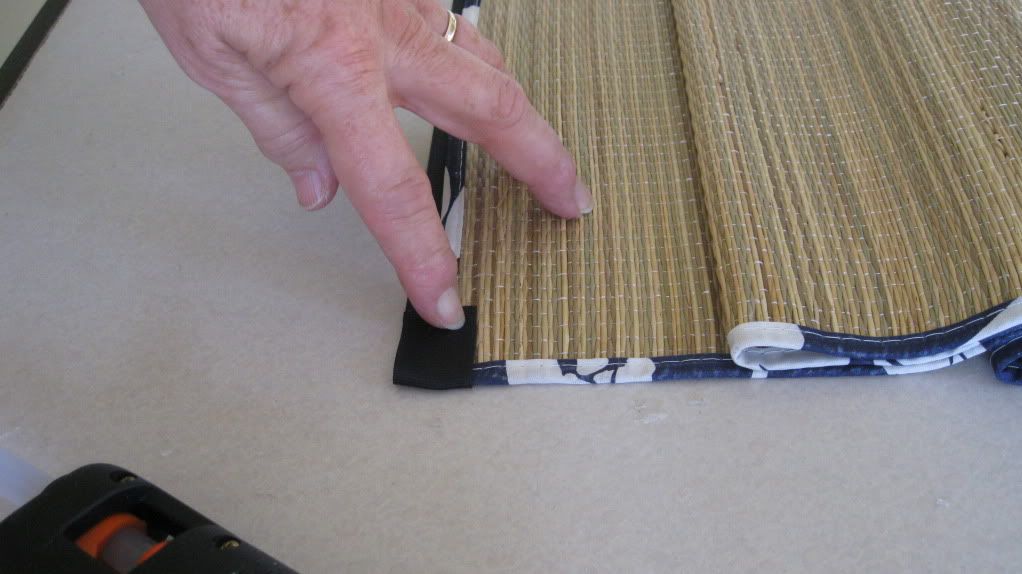
Secure one end of ribbon by placing a dab of glue in the outermost corner of mat. Both sides of grosgrain ribbon are the same, so there's no right or wrong side. Align your ribbon by placing the center of it directly over the glue dab, so that the ribbon is centered over the edge of the mat, allowing the extra inch to overhang the end. Press on top of the ribbon so it sticks well to the glue.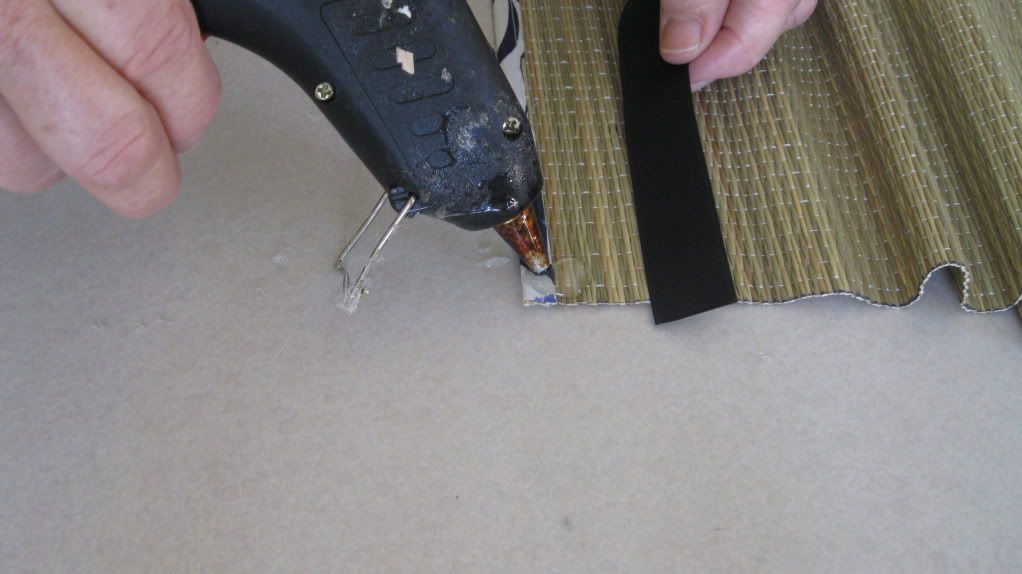 |
| Add a dab of glue to the corner of the mat. |
 |
| .Press end of ribbon into glue, leaving 1-inch overhang |
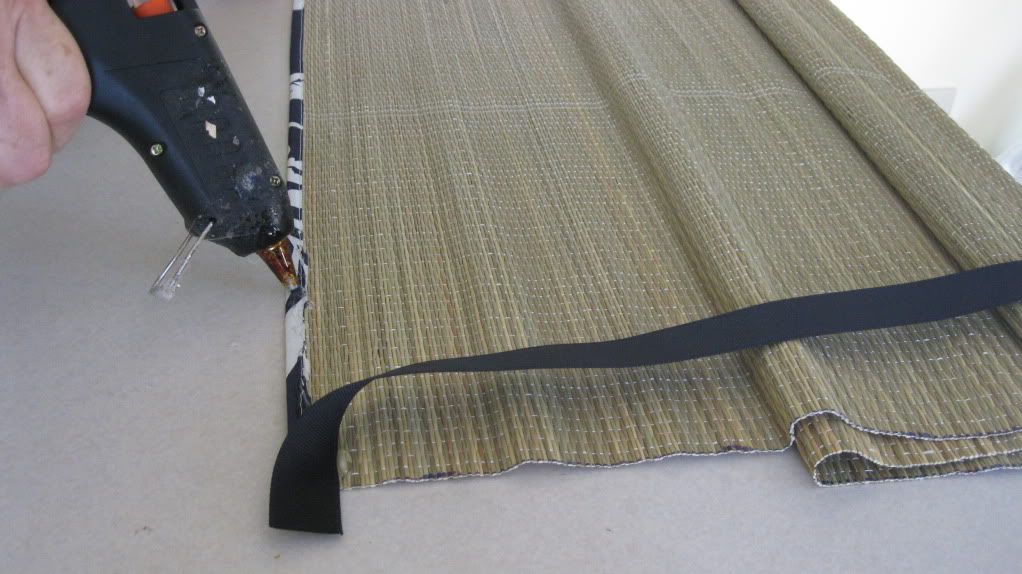 |
| Lay a line of glue 8 to 10 inches long. |
 |
| Lay ribbon in glue, feeling the edge of the mat underneath it. |
Next you want to glue the ends of the ribbon to the back of the curtain. Let glue cool for a minute. Turn mat over. Lay a thin line of glue along the cut end of the ribbon. Quickly wrap the ribbon around the edge of the mat and press it down onto the back of the mat. It’s neater if you put the glue on the ribbon because you know it will be hidden behind ribbon.
 |
| Lay a thin line of glue along the cut end of ribbon. |
 |
| Press the glued ribbon down on the back of the mat. |
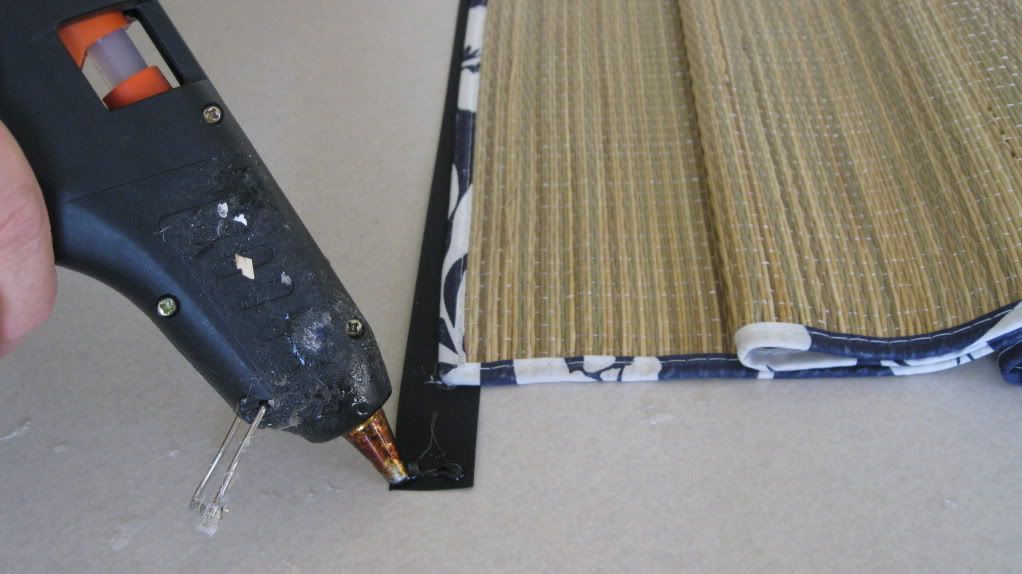
Repeat on other edges
Glue the ribbon along the edge of the opposite end, first making sure you have right side up. Measure and cut ribbon for top and bottom edges as before, adding two extra inches. Glue ribbon to top and bottom edges. Wrap the ends around to the back of the mat just as you did to the first two edges. You should have all 4 edges trimmed in ribbon.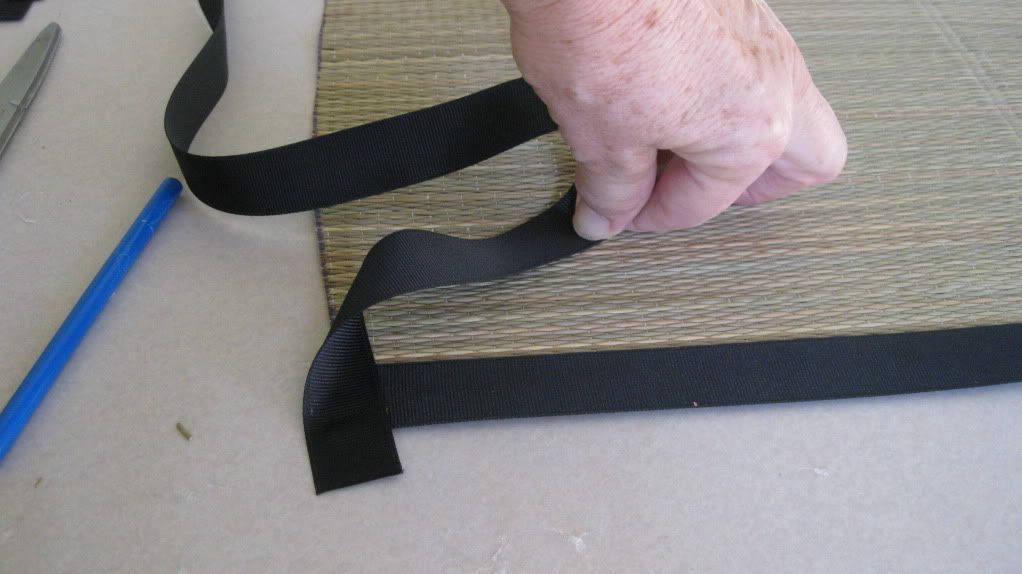 |
| Turn mat over and glue end of ribbon to corner of mat. |
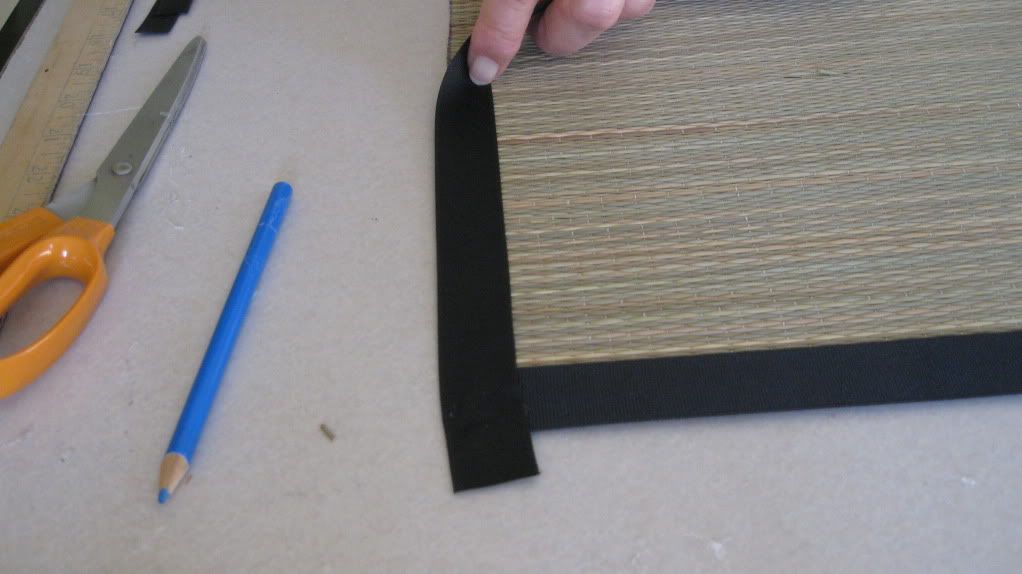 |
| Glue ribbon to top and bottom edges. |
 |
| This what the back of the curtain looks like at one corner. |
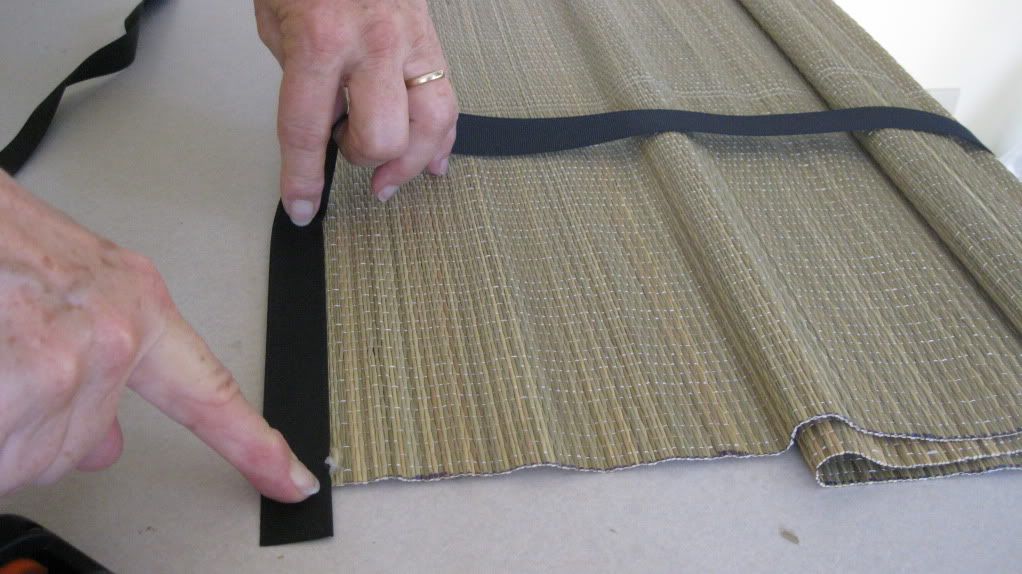
Cut the ribbon loops
Calculate how long the loops should be by wrapping a piece of ribbon around your curtain or drapery rod. Add an extra inch. I wanted a 1 ½ inch long loop to show, so I needed 3 inches for each loop, plus another inch for gluing and slack. I cut my ribbon into 4-inch lengths. Cut your ribbon into the lengths you need, for example, longer than 4 inches for a fatter curtain rod.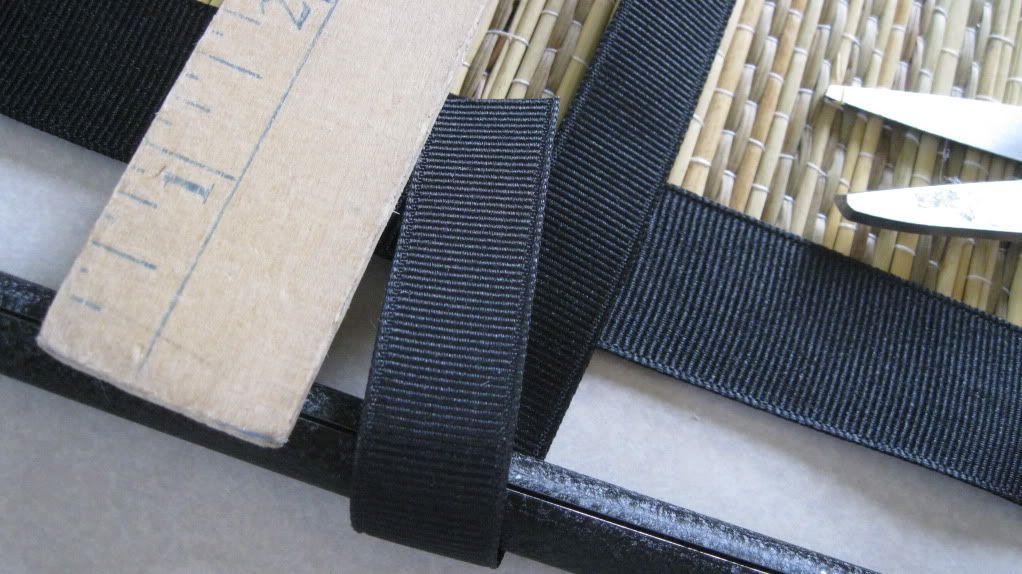 |
| Calculate how long to make loops by wrapping ribbon around the rod. |
To figure how many loops you need, fold mat in half, right sides together. Using a dressmakers straight pin or a piece of tape, mark where the fold is on the back side of the mat. Open the mat, and working on the back side, mark where ribbon loops will go.
My curtain width was 34 inches. I placed a pin on the fold, in the center, 17 inches in from each edge. Using a yardstick I measured and marked with pins points at 8 ½ inches in, and then at every 4 ¼ inches. In other words, divide, then divide in half again to determine points that are equally spaced. Or eyeball the placement, and mark with pins, figuring one loop at each end, one in the middle and the rest spaced equidistantly.
 |
| Use pins or tape to mark where the loops will go. |
Attach ribbon loops
Dab two small dots of glue on one end of each cut ribbon, then fold and press to make a loop. So that all the tabs will be the same length once they are glued on, mark with a dressmakers pencil a line 1/2 inch in from the cut end of each ribbon.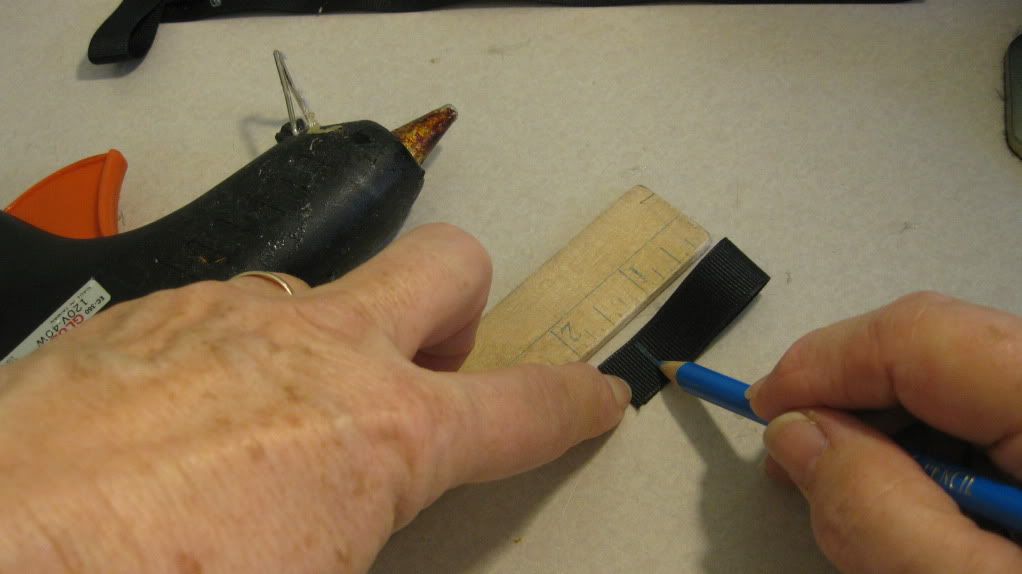 |
| Mark 1/2 inch in from cut end of the ribbon loops. |
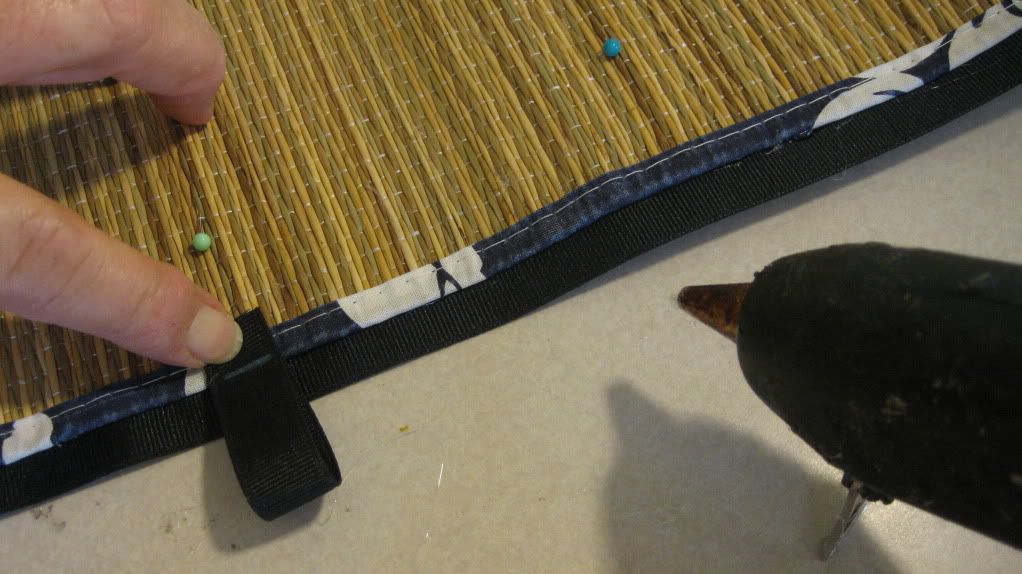 |
| Align each loop with a pin, and with the edge of the mat. |
Be sure your mat is wrong side up. Align the little mark on the ribbon with the edge of the straw mat, and with the pin or tape you used to mark where loops should go. Place a dab on glue on the curtain, and press ribbon loop onto glue. Glue down all the loops, keeping them perfectly aligned, equally spaced, and at right angles to the top edge of the curtain.
Hang your curtains
When the glue has cooled thoroughly, remove one end cap or filial from each of the curtain rods. Thread the loops through the rods, and replace the end caps. Hang the upper and lower rods, each with two curtain panels.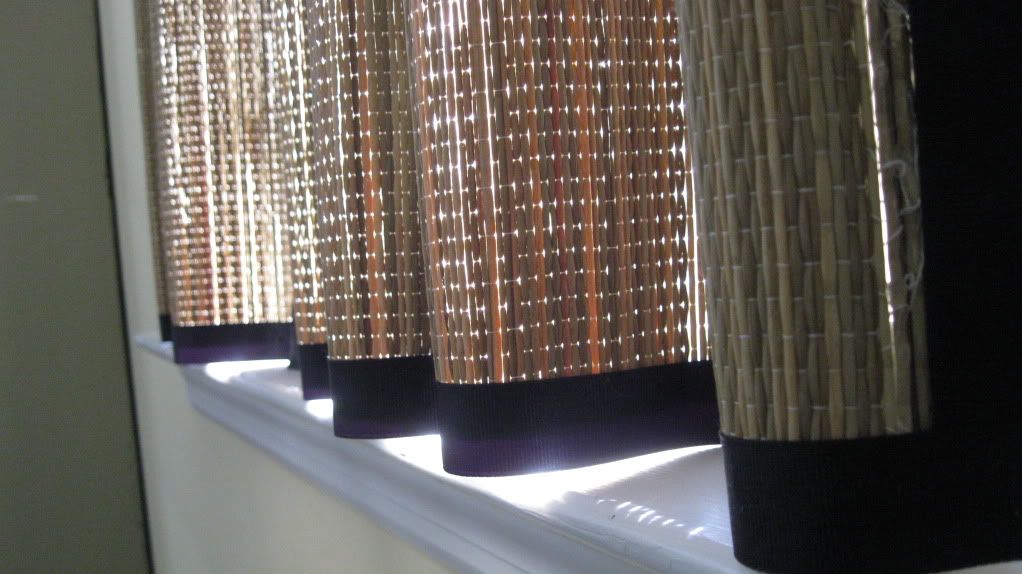 |
| The grass mat filters the sunlight and adds texture to a room. |
My cafe curtains for a 31- by 54-inch window cost me about $21.00 including the two tension rods at $2.60 a piece, and two mats at $2.50 each. If I had to buy mats from Amazon, my cost would have increased by only $7.
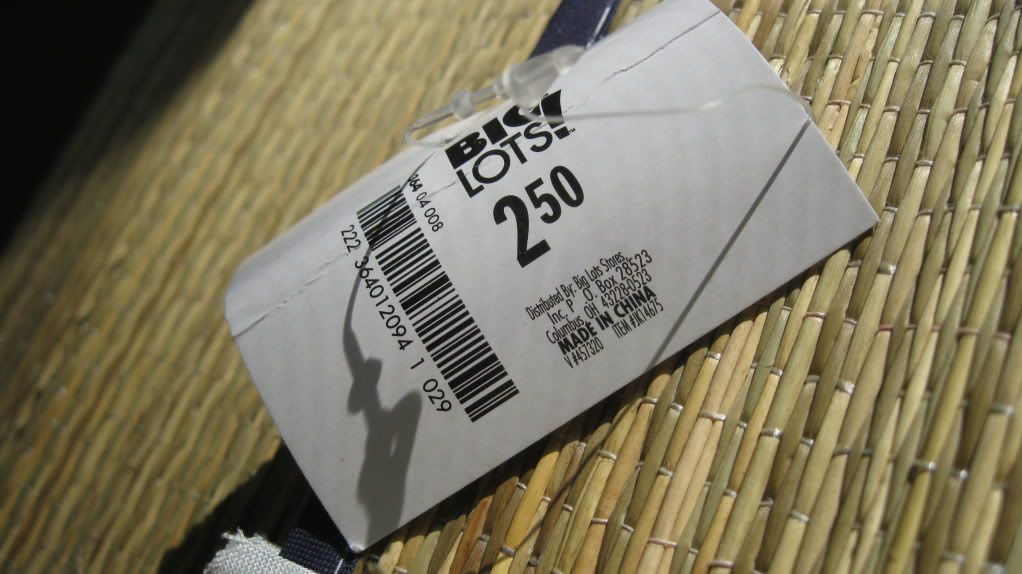 |
| Typical price for a beach mat, in season. |
I paid $10.05 for all my ribbon, but you could pay less if you shop online. Purchased online, you can buy 20 yards of 3/8 inch solid color ribbon for only $2.65, or the same amount of 7/8 inch ribbon for $3.90.
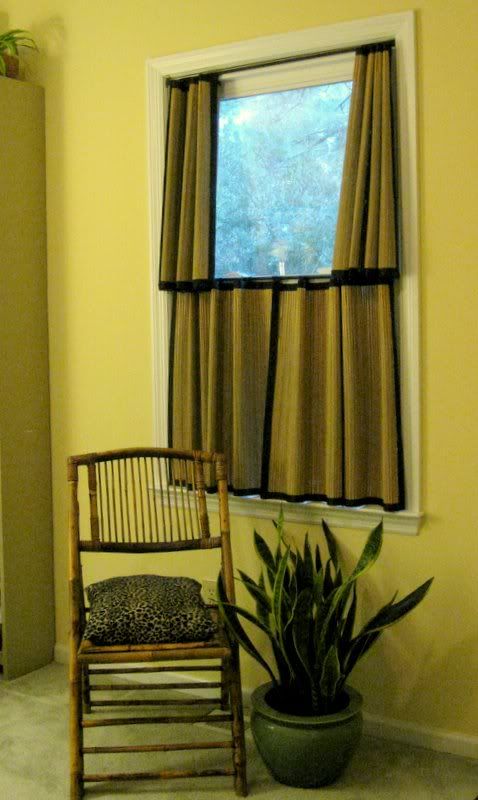 |
| My straw mat curtain lets in light but gives me privacy. I love it. |
Get the look, get the book
My eBook DIY Home Staging Tips to Sell Your Home Fast and for Top Dollar, and my eBook No-Sew Curtains and Draperies to Stage Your Home give you loads of thrifty decorating ideas for making your home attractive to buyers, including how to arrange furniture you already own, how to choose paint colors that work for you, what to buy second hand, how to make window treatments without sewing, and how to use mismatched or out-of-date furniture.