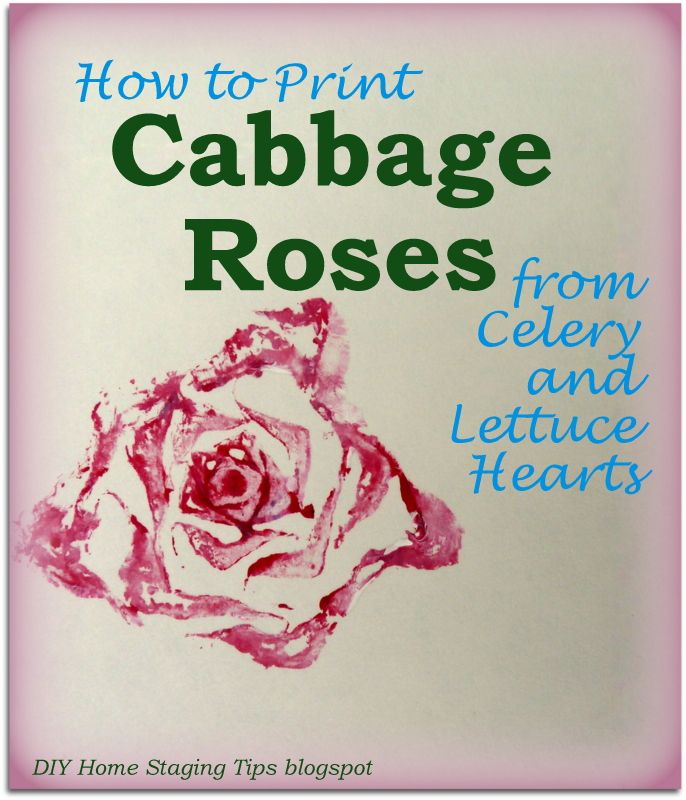
Step one: Gather your materials
Here’s what you need:
- Pencil
- Ruler or T-square
- Posterboard to fit a frame you have
- Plate covered with saran for palette
- Craft paints
- Foam brush
- Bunch of celery
- Head of romaine lettuce
- Knife
- Plain paper for test-printing
- Paper towels to wipe potatoes between color changes
- Poster frame and foamcore for backing.
Step two: Prepare to print
Using a pencil, lightly draw a border a few inches inside the poster board outside edge so that your artwork will have some white space around it. Make the border equal on both sides, and slightly wider on the bottom than the top (see photo above).
Place blobs of each of your colors on your palette. Cut the bottom off the celery, about 4 inches from the bottom. You’re using the heart of celery for printing, so push the celery stalks out to make space between them. Slice the lettuce 2 to 3 inches from the bottom.
Place blobs of each of your colors on your palette. Cut the bottom off the celery, about 4 inches from the bottom. You’re using the heart of celery for printing, so push the celery stalks out to make space between them. Slice the lettuce 2 to 3 inches from the bottom.
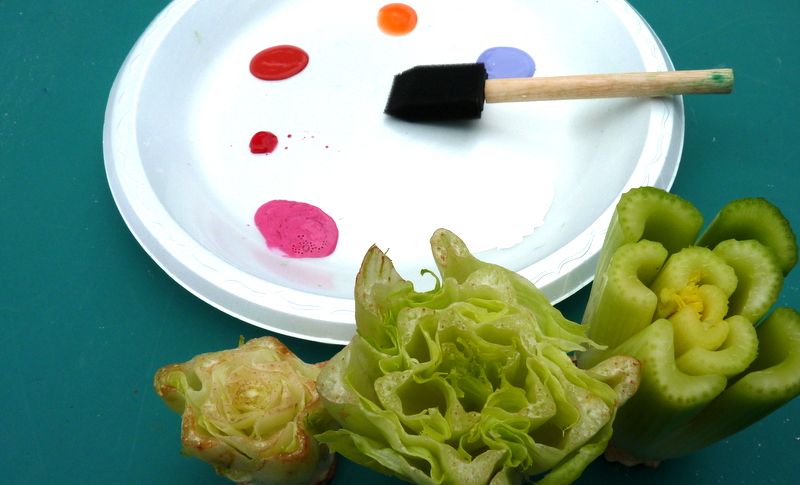 |
| If you prefer, use a paper plate instead of a saran-wrapped dish. I used more than one romaine heart to add some variety. They don't need to be fresh. |
Step three: Paint and print
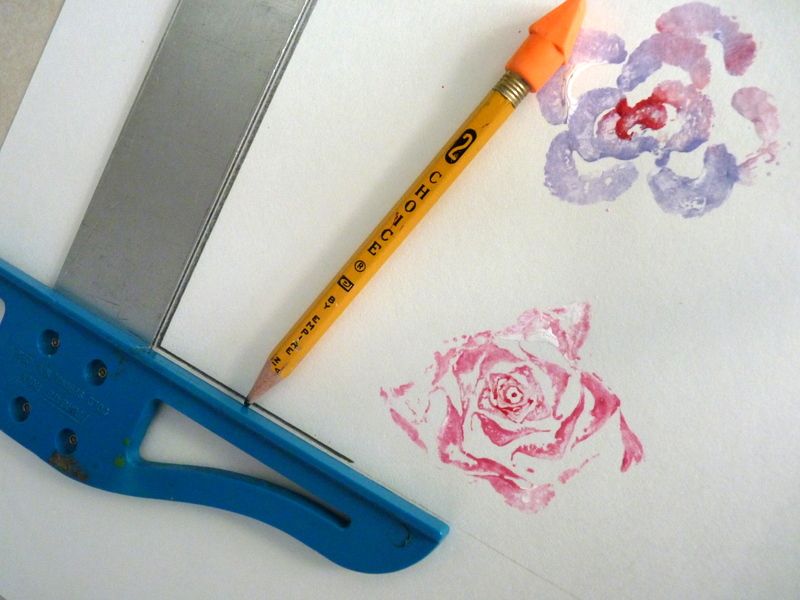
Using the foam brush, generously cover the cut ends of the celery heart with paint. Place the lighter colors in the outside of the “bloom” and add a dab of the darkest color to the very center. Test what a print will look by pressing this painted end onto the plain paper. Print celery flowers at spaces all over the area inside your pencil lines. Do the same with the romaine.
You don’t need to wash or wipe your brush between colors. They will mix on your brush and on the cut celery and lettuce ends. If you find all the paints on your palette have been mixed into one color, add a small amount of fresh paints to your palette, and continue.
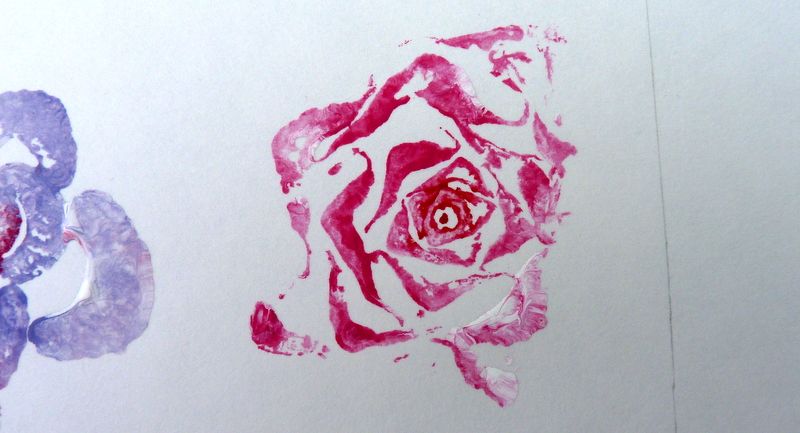 |
| Press the lettuce heart firmly on the paper, but don't wiggle it. |
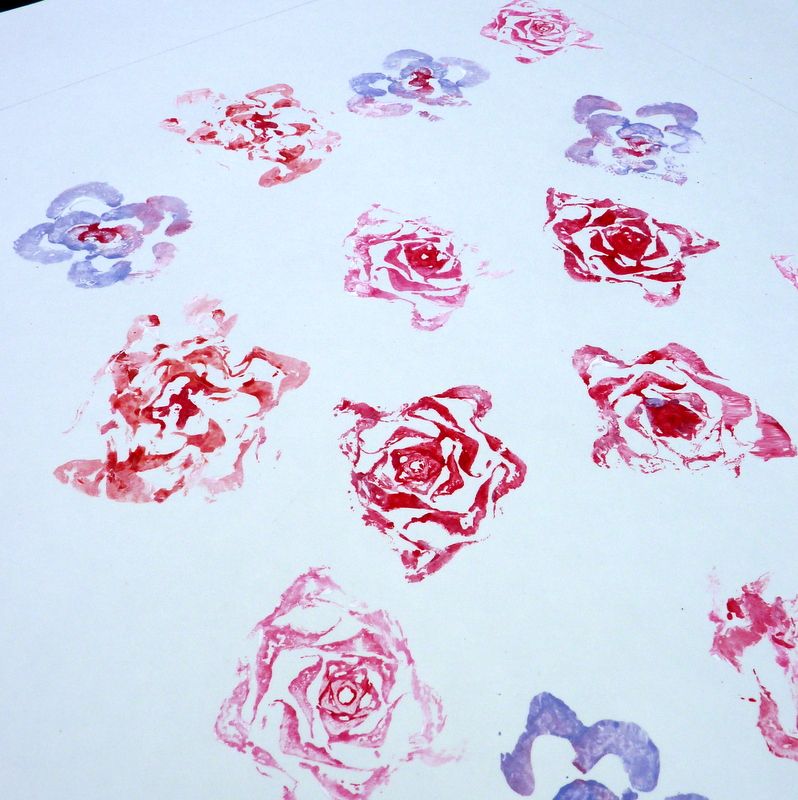 |
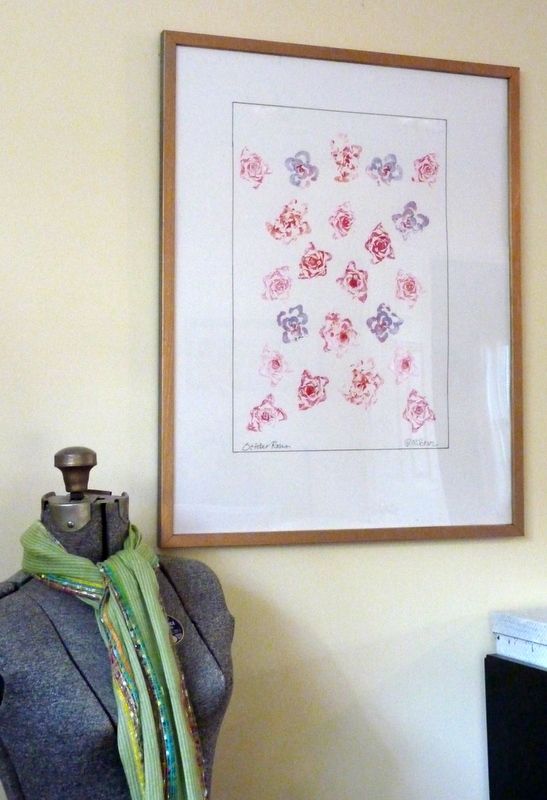
| You can crowd your blossoms tightly together, or not. I like to space them across the paper, reminiscent of old-fashioned wood-blocked wallpaper. |
Step four: Wait and finish
Allow your print to dry thoroughly, probably overnight. Add your signature to the lower right corner, just inside the pencil line, and write the name of your picture in the lower-left corner. Make sure you are signing on the bottom of the print (the one with the wider border). Carefully darken the pencil line if you like its position, and you want to create the illusion of a mat surrounding the rose prints. The best way to do this is to have a T-square, but a good ruler will do if you measure carefully so your corners are square. You can always erase and draw it again.
 |
| Drawing a line around the art is a simple way to upgrade the poster-sized art to look at first glance like it has been matted. |
Step five: Display it!
Place your picture in the frame, back it up with the foamcore, and then secure it with tape around all backside edges of the frame. Then, it's ready for hanging. Using a 50-cent piece of poster board, a $1 piece of foamcore for backing, a poster frame that you can find for around two bucks at second-hand stores, plus a few tablespoons of craft paints, you’ll have a large and lovely framed original!
It’s easy to make your home lovely in the eyes of buyers, easy when you know-how. Learn how by downloading my eBook DIY Home Staging Tips to Sell Your Home Fast and for Top Dollar. You are just two clicks away from staging today!