

They convincingly resemble stone, but are lightweight and porous. People love them because they look old and natural, and these are desirable qualities to bring to a garden. Or sometimes, to an interior tablescape.
Hypertufa is made from cement, and usually peat moss, and perlite. You can make these planters in almost any shape you like. Gardeners and crafters most often make them in a trough shape because that's the easiest and most rock-like shape.
Over the years I have made a variety of hypertufa planters. Properly constructed and cured, your planters will last a long time, about 10 years.
Because they are lightweight, you can take them with you to your next home. Meanwhile, they will add some authenticity and charm to even the smallest garden spot you have. They are perfect for plants that prefer well-drained soil, like rock garden alpine plants, cactus, herbs, and succulents.
Please don't be put off by the detailed instructions. It's a lot like making mud pies, but there are some specifics that need attention if you want a vessel that won't fall apart.You can read my simple directions here, and you can read Martha's instructions, hypertufa forums and other tutorials for making hypertufa planters and ornaments.
Gather your materials
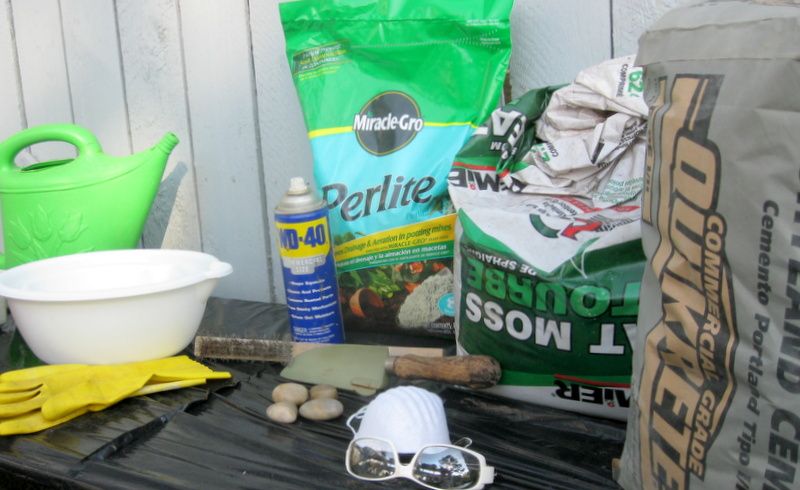 |
| These are the things you need to make a simple faux-stone planter. |
Portland cement. Do not use concrete or Quickset mixes. Only Portland cement will do. Unfortunately, unless you have a stonemason for a friend who will sell or give you a smaller amount, you'll have to purchase the 47-pound bag sold at home improvement or builder supply centers. The cost is nominal -- about six bucks -- but the weight could be a problem. And the bag usually leaks a little, so throw a tarp in your pretty little trunk first. Get help if you are going to hurt yourself lifting this baby.
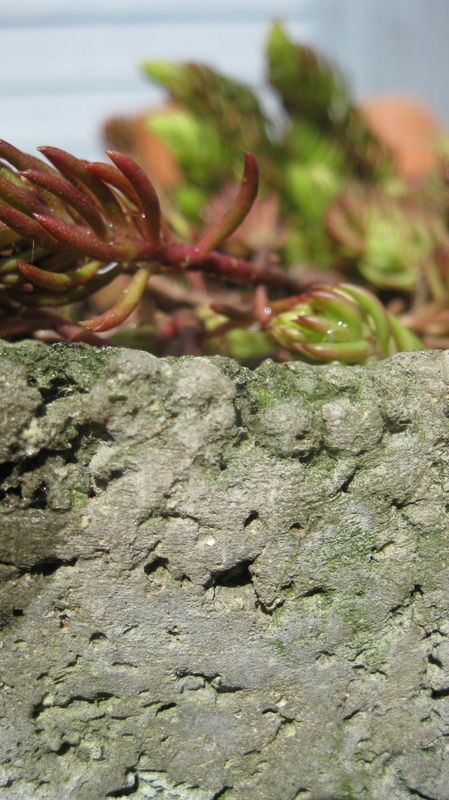 |
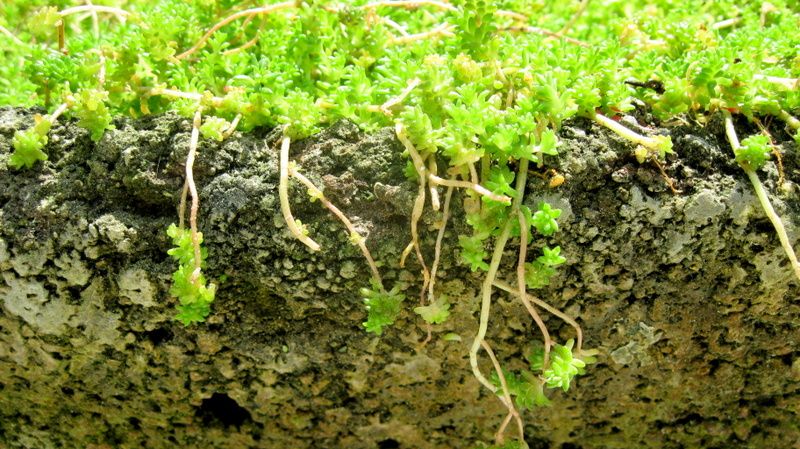
| Plants like sedum love hypertufa. |
Perlite. You'll recognize this as the little white beads in your everyday potting soil. An 8-quart bag costs $4.50, and you can use what's leftover for your container plant mix.
Latex or rubber gloves. Use the dishwashing kind that will stand up to the task. Concrete will tear up your skin and nails!
Dust Mask and Safety Goggles or Glasses. Cement is a fine powder that blows around and when it lands on a moist surface (like your lungs or in your nostrils) it reacts chemically. You do not want to breathe cement dust or get it in your eyes. Be safe. Don't take the mask and glasses off until the mixture is wet and thoroughly mixed.
Containers for forms. Collecting these might be your most difficult task for this DIY project. You need two similarly shaped vessels, one slightly smaller than the other. These containers could be cardboard boxes, plastic containers, Styrofoam forms, wooden boxes, or even baskets. Do not use metal containers. Larger projects should have a 2-inch space between the two containers, and smaller projects are fine with a 1-inch space. This space will be the wall of your hypertufa planter.
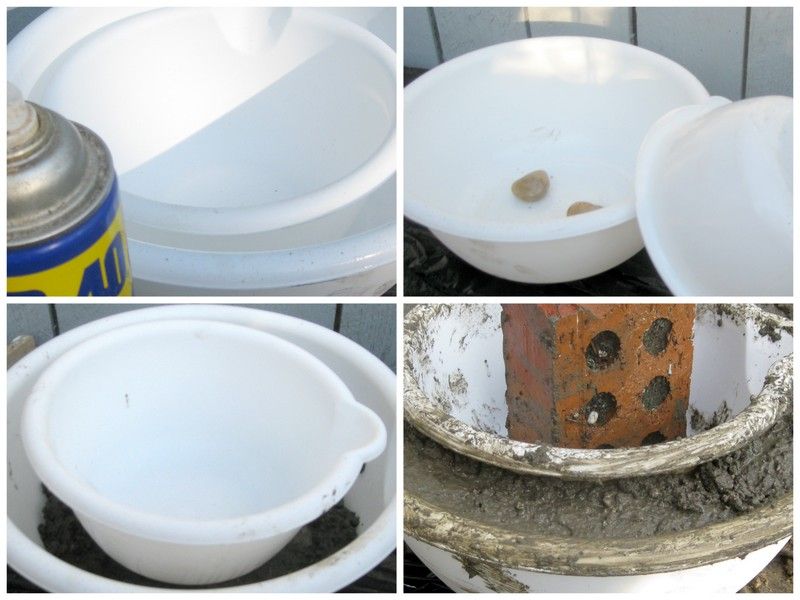 |
| I used two plastic mixing bowls from a matched set. I added rocks to the bottom so I could knock them out later for drainage holes. I weighted the inner bowl with a brick after filling the space with the wet mixture. |
Release Agent. I use WD-40, but cooking oil spray, silicone spray, or Vaseline will work as well. The release spray makes it easy to separate the mold from your planter once the cement has hardened.
Garden hand trowel or masons trowel. You'll use this tool to mix the ingredients, and pack the form with the mixture. You may also use it to scrape sharp edges away from the container before it is completely hardened. If you are mixing a large quantity in a wheelbarrow, you may want a hoe as well.
Wire brush. To soften the sharp edges of a partially cured hypertufa trough or pot, you'll want a wire brush. Brushing the smooth sides of the container will give it a rough, natural finish rather than a smooth one.
Water, measuring vessel, and mixing bin. The water source doesn't have to be directly next to your work. You'll use your measuring vessel to measure the ingredients. The mixing bin can be a roomy plastic dishpan, a bucket, or a wheelbarrow.
Plastic sheeting. Cut open a plastic garbage bag. Use this to cover your work surface, and then to cover your container while it cures for a day or two. This DIY project can be messy, so wear work clothes and choose an area where you can make a mess temporarily.
Mix the ingredients
There are different formulas for what goes into a hypertufa mixture. I used for this tutorial --- 1 part cement
- 1 part peat moss
- 1 part perlite
Put on your dust mask and goggles. Measure the cement, the peat moss, and the perlite into the container you are using to make your mixture. I used my wheelbarrow, and I scooped 8 containers of each ingredient. Using the trowel, combine these dry ingredients. Then add an equal amount of water, slowly, mixing well after each addition. Let the mix stand for 10 minutes so the peat moss can absorb the water.
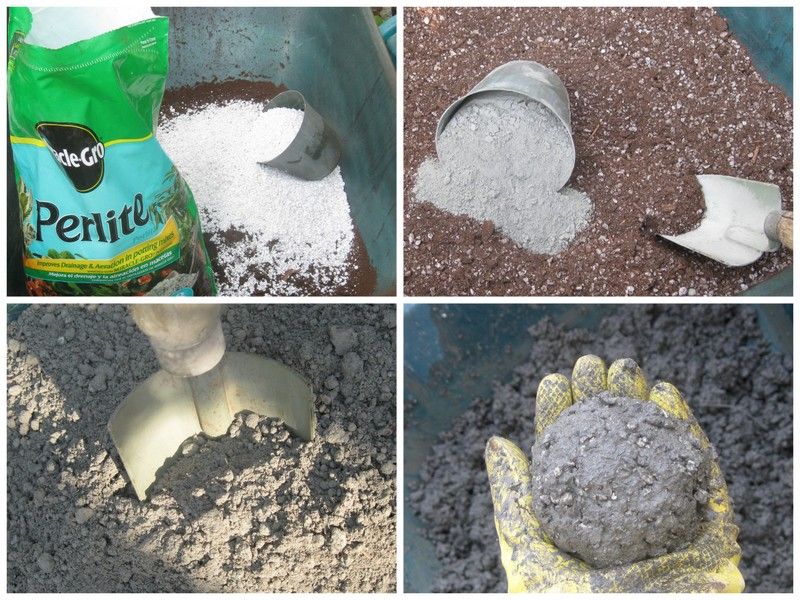 |
| You can see the size of the scoop I used for measuring perlite, peat and cement in equal portions in a wheelbarrow. The bottom left photo shows the dry mix, and the bottom right shows the correct wet consistency for a hypertufa mixture. |
Use this time to prepare the pairs of containers you'll use for molds. I made three containers from my batch for this tutorial, and I used about half the bag of cement. Spray or rub the interior surfaces with release agent. If the material is cardboard, it doesn't need a release agent because you can just tear the cardboard away. Have on hand any shells, leaves, or rocks if you want to add these as design elements.
Fill your molds
Check the mixture for consistency. It should be wet but not runny, so that it clumps together in your hand, and even allows some water to run out when you squeeze it. If it is drier than cottage cheese, add some water. Fill the containers, packing the mixture into all the corners. Cover the molds entirely with sheet plastic. The plastic seals in the moisture so the cement can cure slowly at an even temperature.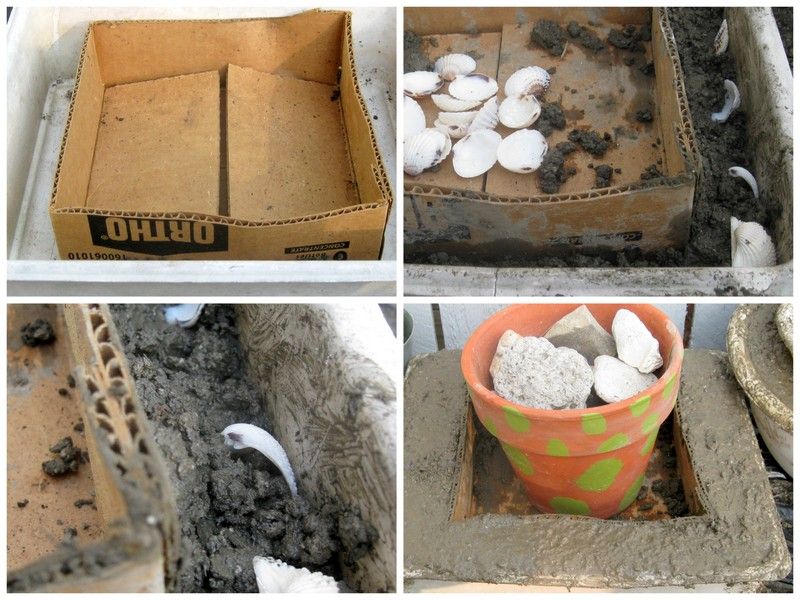 |
| Inside a square plastic bin I used a cardboard box that left a three inch well all around for the hypertufa mix. I added sea shells to the outer edge, and I weighted the cardboard box down with a flower pot full of rocks. |
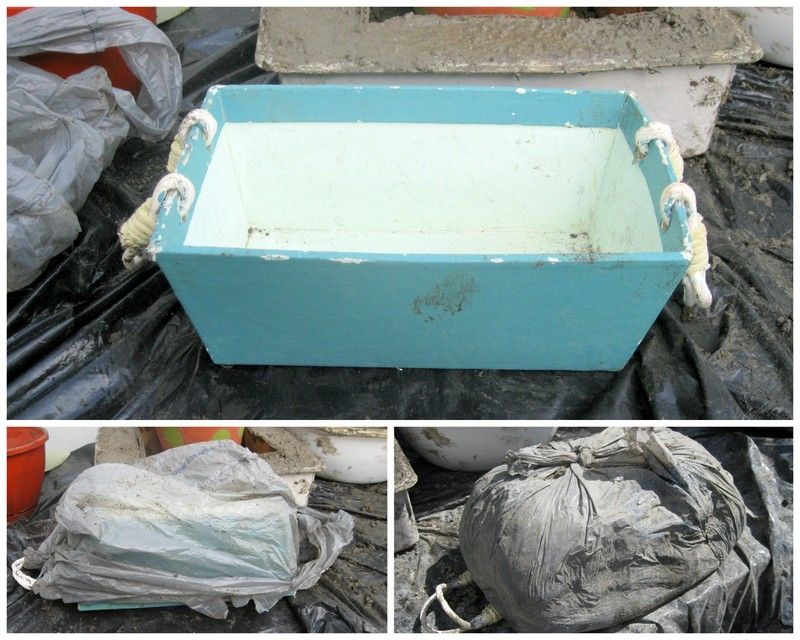 |
| You can make a free-form hypertufa container by inverting a cardboard box, covering it with plastic, shaping the hypertufa mix over the box, and wrapping it in the plastic to cure for a day or two. |
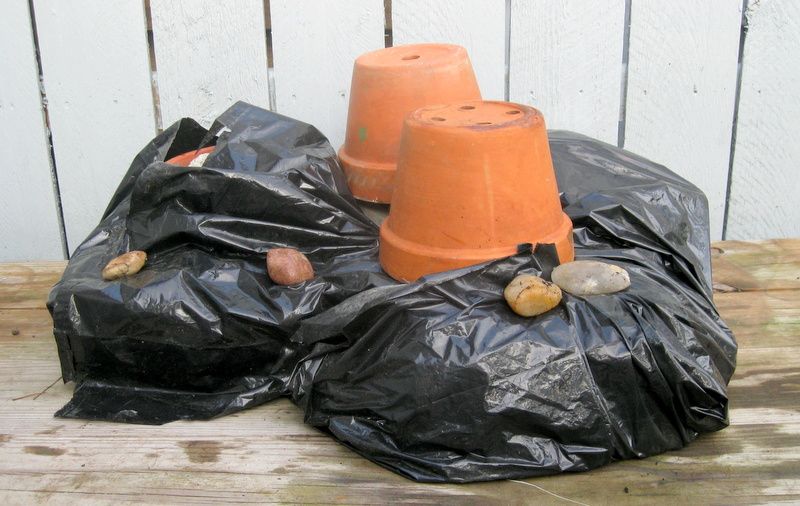 |
| This is how the three containers I made looked during the first 24-hour curing period. I used the plastic garbage bag I covered the work surface with, to wrap the vessels, and weighted it with stones and flower pots. |
Clean up, and cure
 |
| My hypertufa trough can be used indoors and out. |
Do not disturb the covered containers for 24 hours, or 36 hours if they are large.
Then, wear your gloves when handling the still-uncured cement containers. Uncover them and carefully unmold your creations.
The containers then need to cure for 2 more weeks in the shade.
Keep them away from temperature extremes or dry heat.
Unfortunately, you cannot grow plants in them during this 2-week curing time because the cement is leaching lime as it cures.
Hypertufa containers change color from brown to grey as they cure, and if left outdoors in damp weather may develop a mossy covering.
Some gardeners create this growth my introducing moss spores to the surface.
 |
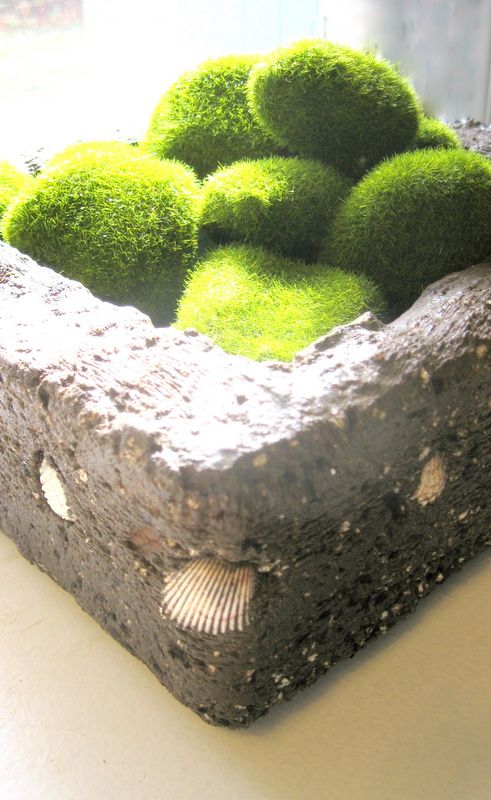
| The texture of hypertufa can be smooth like polished granite, or rough like volcanic stone, as above, depending on the mold you choose and how you finish it before it cures completely. |
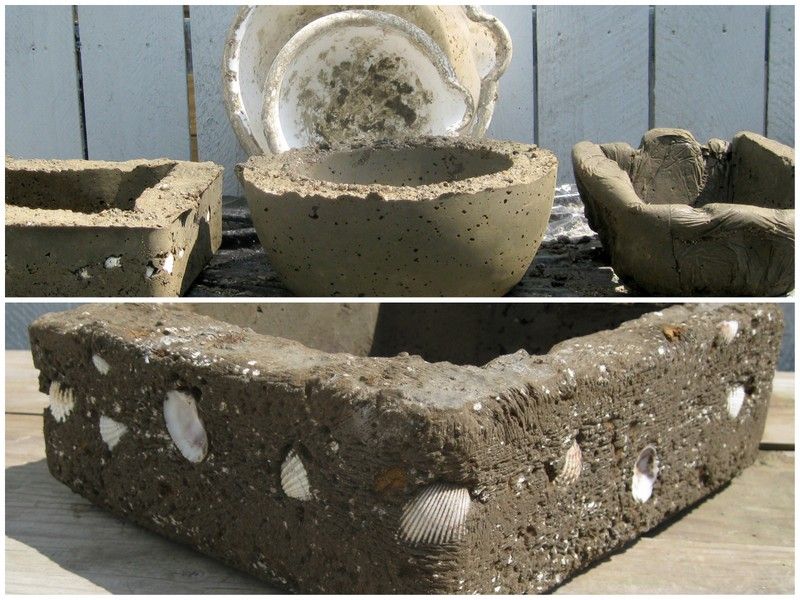 |
| The top photo shows the three planters I made for this tutorial, plus the mold I used for the center, smooth one. The far-right container shows the free-form approach. To reveal the shells I used a wire brush on the square container after unmolding it. I used the brush to soften the edges, and rough up the texture, too. |
Or make dry arrangements with dry floral foam, the way I did using silk tulips in the photo above.
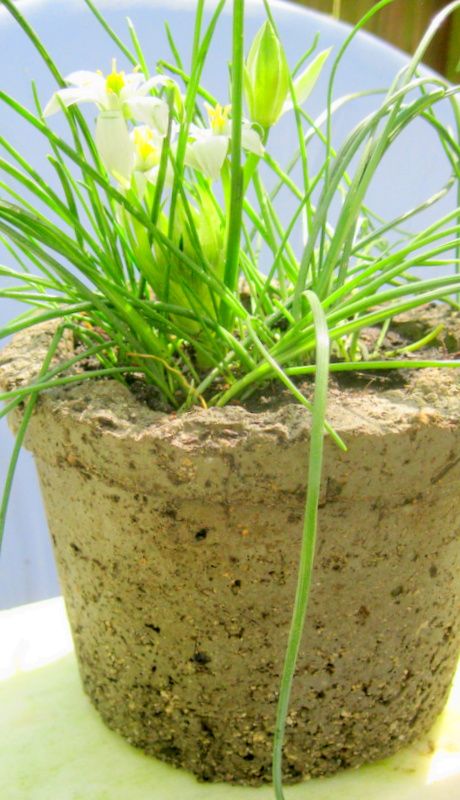
Out of doors, bulbs and seedlings, and slow-growing herbs are happy in hypertufa containers. I forced these allium bulbs in a hypertufa container I made years ago, using a plastic flower pot for a mold.
I hope you will try your hand at making these unique containers.
I also hope you'll order my eBook, DIY Home Staging Tips to Sell Your Home Fast and For Tor Dollar. In this easily downloadable PDF-formatted book, you'll discover all kinds of easy ways to dress up your home on the market. Your competition is staging. Are you?