How to Make Your Closets Look Larger

Monday, November 07, 2011
The great thing about a closet is that you can shut the door (or at least you should be able to!) because people don't go peeking into closets when they stop by to borrow some butter.

But when you're selling your house, all bets are off.

You know that prospective buyers touring your home will open all your closets to see how big they are.

They want to know if their stuff will fit.

Closet and cabinet space can make or break a deal for house hunters. So my challenge to you is to clear some closet space to make them every homeowner's dream: spacious and organized.

Here are the common closet problems, and solutions for each.

Overflowing linen closet

1. Store one extra set of bed sheets in each bedroom.

2. Fold clean towels neatly on a shelf in your laundry room.

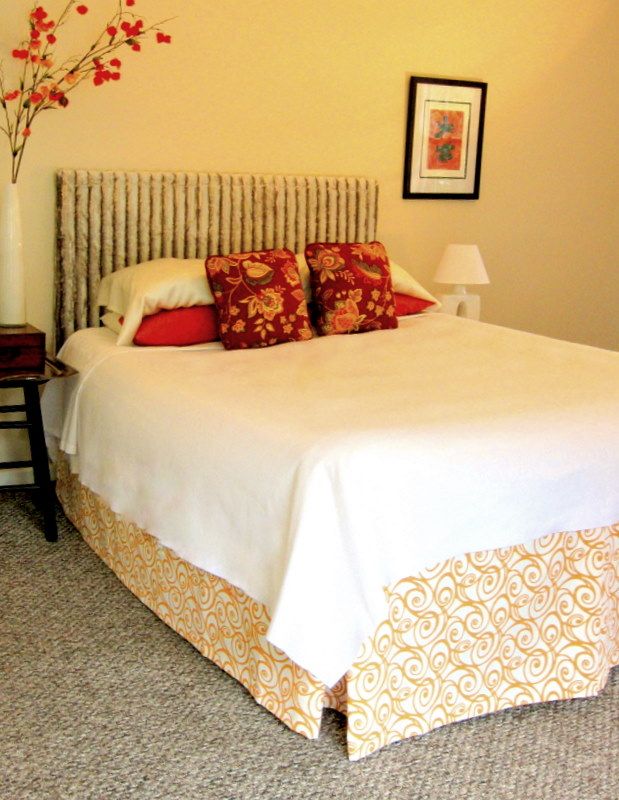
3. Put the extra blankets to use by draping one neatly across the foot of your bed.

4. Reduce the number of sheets and towels you store by getting rid of ones you don't use or love.

5. Store quilts and flannel sheets in plastic bins under a bed during the warm months.
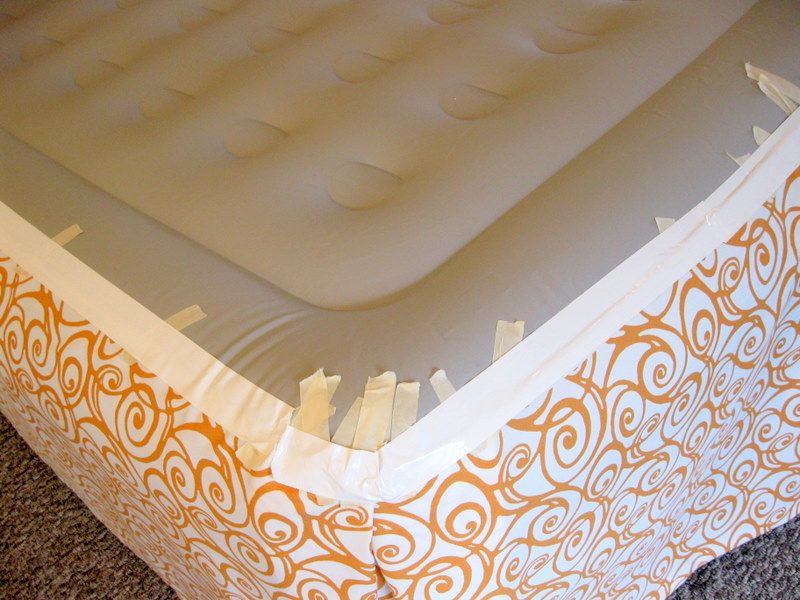
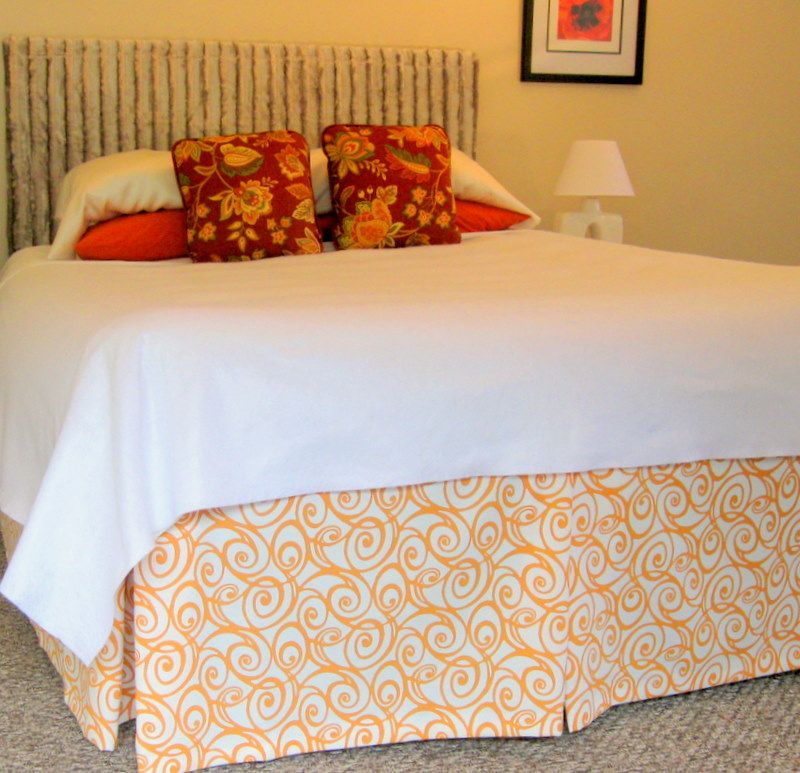
Reducing clutter, and keeping things organized
and hidden make closets look bigger.
Photo: Shades of Blue Interior

Cleaning supplies area

1. Keep a small cleaning caddy under a bathroom sink.

2. Place every item in the room it is intended for: extra laundry detergent in the laundry room, dish soap under the sink, garbage bags in the bottom of the trash can.

3. Create a small space for a broom and dustpan combo next to your washer or dryer.

4. Look for hidden places where you can hang brooms, mops, dusters, and other tools. Inside a closet, on either side of the door opening is always a place that's out of sight unless it's a walk-in closet.
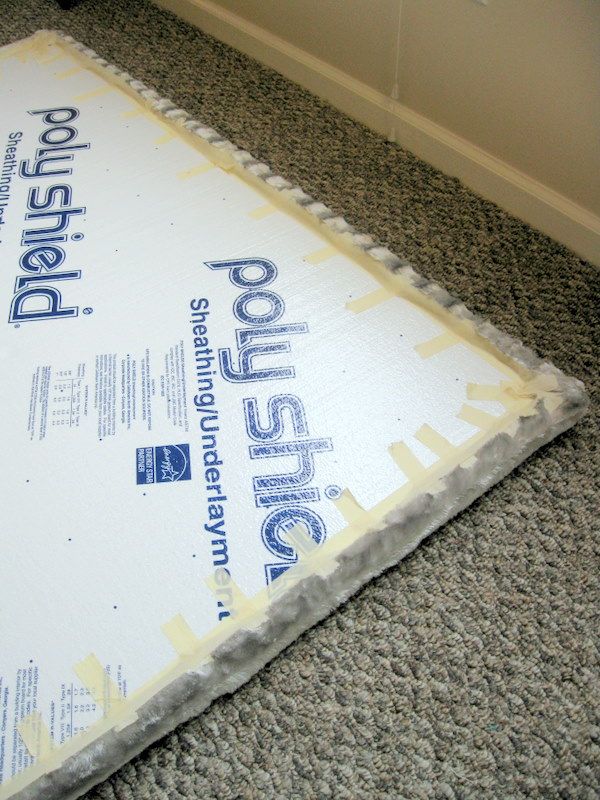
A coat closet might be one of the
first closets people on tour will 
peek into. Photo: Rylex

Jammed coat closet 

1. Hang a row of hooks in your entry to catch backpacks and purses.

2. Pare down the coat selection to two coats per person, and either part with the rest, or put them in a space-saving bag, out of sight until the move is over.

3. Keep hats, scarves, and other small items in a box on the shelf.

Out of control pantry 

1, Stop buying in bulk. Unless you have an abundant and well-organized basement or garage storage, it might be worthwhile to put your bulk wholesale membership on temporary hold. Nothing shrinks a cupboard like an over-sized supply of food and paper goods.

2. Empty prepackaged snacks out of their boxes, and use a matching plastic or glass containers to organize the snacks.

3, Double your shelf space with a few risers to stack things like cans or spices.

4. Toss out-of-date packaged foods, old spices, and nonperishable foods you bought years ago and have not used.


    Stage your closets

    1. Store folded clothing in baskets or boxes that match, preferably light-colored containers, the way the baskets and bins look in this photo from A Bowl Full of Lemons via Good Housekeeping. 

    2. Invest in slim hangers that match.  

    3. Get into the habit of rotating your clothes seasonally so that half of your clothing is out of sight at all times.

    4. Add additional, compact storage, such as a free-standing drawer unit, a small bookcase for shoes, or a double-hung closet rod.

    5. Hang a mirror. Even a small one makes a space feel larger.

    That junk closet?

    1. Inventory the contents and define a purpose for the space. Then, find homes for random items that do not fit with the purpose.

    2. Prepare yourself to part with infrequently used items. It's not called a "junk closet" because it's filled with your most beloved belongings, is it?

    3. Hide odds and ends in pretty storage boxes like matching canvas-covered boxes and a set of coordinated hatboxes. There are plenty of choices at discount and dollar stores. These containers will unify the space rather than draw attention to its hodgepodge contents.

    Get the look, get the book

      Once the contents are under control, each and every closet is automatically going to seem larger. You can proudly leave your closet doors open and let the compliments roll in!

      You'll find plenty of other tips for staging your own home in my eBooks. You can download now and start planning your home staging immediately.

      Top Photo: Real Simple


      Faking a Bedroom- Part 2: DIY Bedskirt

      Thursday, November 03, 2011

      On Monday I showed you how to make a low-cost headboard to stage a bedroom.

      Because bedrooms are important to buyers, they need to look irresistible!

      Today's tutorial shows you how to make a beautiful bedskirt to disguise the inflatable mattress we used to stage an empty space as a bedroom.

      Start with a fabric that is not difficult to match when constructing the bedskirt. Plaids, wide stripes, and one-way designs are difficult to match. A solid color, a small geometric, pinstripes, or a design that looks random, works best. Make sure the fabric is opaque enough so the inflatable does not show through.

      This bedskirt has box pleats at the corners. It gives the bed a tidy, tailored look, isn’t too girly, but adds a small amount of fullness. You can put one more box pleat midway on each side of the bed for a more custom look. If you decide to add side-pleats, you’ll need to add another half yard of fabric.

      What you need  

       Inflatable bed
       3 ½ yards of fabric
       Iron and ironing board
       Scissors
       Yardstick
       Masking tape
       Duct tape

      How to do

      Make sure the inflatable is completely blown up and that the valve is secure, because if the bed deflates, the bedskirt will not be the correct length. Set the bed on four milk crates, as shown in the headboard tutorial.

      Fold the fabric in half lengthwise. Be precise.


      Iron the lengthwise fold. This crease will give you a line to cut on to divide the fabric into two lengths.


      Cut the fabric in half, along the fold.


      Turn over a 1-inch hem along the cut edge of both pieces of fabric. Pin the hem as shown. If you chose a one-way design, use the selvage (the woven edge) to be the hem on one of your two cut pieces of fabric. Otherwise, the design on one side of the bed will run upside down.


      Iron the hem. Iron right up to the pins, but not over them, so that you have the entire edge pressed without leaving marks where the pins are. You are going to use masking tape to hold the hem in place, and you won’t be able to iron over the masking tape, so make sure all wrinkles and creases are out.


      Use masking tape to finish the hem. Leave the pins in place until you have the entire hem taped. We're making a temporary bedskirt in this tutorial. If you want to sew the hem, or use fabric glue or fusible tape, knock yourself out.


      Find the center of the inflatable’s bottom edge (the “foot of the bed”). Mark the center spot with a small piece of masking tape. Fold three or four inches back, and tape the folded end of one fabric length to this mark.  Make sure the hem sits just above the floor. Finger press the fold for a crisp look.


      Tape the opposite end of the same length of fabric just around the corner at the head of the bed, checking to be sure the hem sits just above the floor.


      Tape the fabric length at the center of the bed’s side, and at the front corner in two places. Let the excess fabric fall as shown.


      Bring the center of the loose fabric to the corner of the inflatable bed, and tape it to the bed.


      Create a box pleat at the corner by folding the two side pieces to meet at the corner, as shown, and tape in place. Finger press the folds.


      Repeat this process on the other side of the bed, starting at the foot of the bed. Slide the end of the second length of fabric under the fold of the first length of fabric. Then fold the second length of fabric to create a box pleat. Tape in place. Don’t worry if one fold on one side is deeper than the other, as long as they look okay from the front. Finger press the fold.


      To make the temporary bedskirt stay reliably in place, tape the top edge to the inflatable using duct tape. I used white duct tape because that's what I had, but ordinary duct tape is fine.


      Cover your bed with a blanket, bedspread, or duvet that covers the taped edges on the inflatable, and that is thick enough to hide the indented pattern on the top of the inflatable.


      Once an empty bedroom is staged with a headboard and a beautifully made bed, you’re on your way to creating that luxurious bedroom buyers respond to.

      Get the look, get the book

      Did you know that I've written an ebook -- not a pamphlet, but an illustrated 150-page pdf -- all about staging your own home for the real estate market?

      You can download it now, and begin making your home the one that stands out from the competition. Staging sells homes.

      Whether you did it deliberately or not, your home is already staged. Make it staged to sell, by following the easy advice in my home staging ebook, DIY Home Staging Tips to Sell Your Home Fast and For Top Dollar.  


      DIY Headboard and Make-Believe Bed

      Monday, October 31, 2011
      Do you need to stage an empty bedroom, or make a glam headboard to gussy up a drab bed?

      You've probably seen photos and tutorials for DIY headboards on the web, but many of them don’t make sense for someone staging a home for sale.

      Someone who's trying to save all the cash they can to pay for that down payment on the next house.

      Someone who doesn't want to buy and then have to move or store bulky sheets of plywood or wooden frames.

      Someone who has other things to do than spending all day hand-tufting a piece of pricey decorator fabric.

      Someone who can't stand the thought of making holes to hang or stabilize a heavy headboard onto the newly painted walls. Does that sound like you?

      Here is a hassle-free, DIY headboard you can make to stage a bedroom. You can make it from a fluffy blanket or a puffy quilt. I used a duvet with a large quilted pattern to make the grey headboard you see here. Even a sleeping bag is the right thickness.

      What's so special?

      This headboard starts with a sheet of foam core sheathing sold in the insulation aisle at home improvement centers. It’s lightweight and will cost about $10 for the half-inch thickness I used.

      To cover the piece of foam core in this tutorial, I used a faux fur throw.

      The faux fur was as wide as the queen size inflatable bed I used. It even had a subtle border that I was able to run across the top of the headboard. It was plush enough to soften the edges of the foam core panel. A thick covering like this means you don't have to bother with a layer of polyester batting or expensive foam. Easy!

      The inflatable is my choice for staging an empty bedroom. It’s cheaper and more practical than investing in a box spring and mattress, and easier to deal with on moving day.


      What you need

      • One inflatable bed, and pump
      • Four milk crates, of equal dimensions
      • One 4- by 8-foot sheet foam core insulation
      • Yardstick
      • Ballpoint pen  
      • Utility knife
      • One thick blanket, quilt, duvet, or fake fur throw
      • Masking tape or duct tape

      How to do

      Blow up the inflatable, and put the head of it against one wall, where you want the bed to be. Set one milk crate about a foot inside each of the four corners of the bed.

      “Dry fit” the foam core behind the bed to check the size.

      I had already roughly trimmed with a utility knife my 4- by 8-foot piece to about the size I knew I wanted, adding a few extra inches.

      Mark the width you want the headboard to be. It should be a little wider than the bed.

      You can make rounded corners by tracing around a plate on the upper two corners.


      Measure carefully so the headboard will sit squarely. My orange yardstick shows where I wanted to cut the panel. Mark the cut-off line with your pen.
       
      Cut the foam core panel with the utility knife, using a sawing motion, being careful not to cut carpeting. Bend the foam core panel to break it, then finish cutting all the way through, using the utility knife.


      Lay your blanket face down on the floor.

      Center the headboard on the blanket. If there is a large pattern to your blanket, or if it has a centered design, center the design.

      If the fabric has an obvious up-and-down design (like letters or figures), be sure “up faces up.”

      Wrap the blanket around the foam core panel edge.

      Place masking or duct tape at intervals all around. My blanket had stretch to it, so I used lots of pieces of tape to make sure it was stretching evenly. Re-check your front design.


      Finish taping so all edges lie flat and are secure.

      Duct tape is preferable if you plan to use the headboard long-term.

      Slide the headboard behind the bed. If you want to make it taller, you can tape a string to the back and hang it on small nails. Usually, setting it on the floor works fine.

      Your new headboard is complete. With the right bedding, you can create any look you want for staging your bedroom.


      To hide the fact that the bed is an inflatable, you’ll need to make a bedskirt. Later this week, I’ll post my tutorial showing how to make the tailored bedskirt shown below, with box pleats at the corners and center. It calls for just three and a half yards of fabric -- fabric that you can use again another time. Like, after you have sold your house want to make curtains for your new home!

      Bedrooms are often the first room buyers look at when they tour homes. An empty bedroom is a missed opportunity to showcase your home as a comfortable, accommodating, and special place, yet it can be the most economical room to stage. A beautifully made bed, a headboard, some art, some plants, a bedside table or two, and you're done!

      Get the look, get the book

      For more ideas on how to stage your own home on a shoestring, download my eBook, DIY Home Staging Tips to Sell Your Home Fast and For Top Dollar.

      Home for Sale? Pretend You Are a Tourist in Your Town

      Monday, October 17, 2011
      Every home needs a welcome sign.
      If you are looking for ways to make your home on the market stand out, try looking at it with fresh eyes. The eyes of a tourist to your town.  

      I checked the stats, and can report to you that according to a 2010 survey by the U.S. Census Bureau, almost 12% of the people who moved, moved to a different state. Almost 17% moved to a different county in the same state.

      Even if prospective buyers for your home are from another neighborhood, staging your home to accentuate what's special about your neighborhood, your town or county or state is just plain smart.

      I've blogged already about the value of knowing the specialness of your part of the country and your own location.

      Last week I spent a few days in another place, a part of my state that is worlds away. Getting there takes just 2 hours by car and then 2.5 hours by ferry.  Yes, ferry. We went to Ocracoke Island, off the North Carolina coast. 

      Once on this small strip of sand, surrounded by the sea, life slows down and you can't help but savor the simple things. Fresh, salty air and bright blue skies that reach to the level horizon in all directions. Friendly, honest people who still sprinkle their thick brogue with words that no one has used since Shakespeare's time. Seafood prepared with attention to its real flavors. An appreciation for the way life used to be, when a boat brought mail to you once a week.

      We chose the perfect season to visit. Weather was ideal, and beaches were uncrowded.
      I did not take pictures of people's homes, but I did take photographs of signs, because I think words painted on wood and words printed onto museum labels tell interesting stories. I hope you'll enjoy the photos I brought home. And I hope you can see the beauty of your own location, if only to help you merchandise your own home on the market.

      When you live on sandy shores, and going barefoot is the order of the day, you need this.
      From Ocracoke you can go kayaking or go fishing, or just let someone else take you cruising.
      The sign gives you the idea of just how small the inhabited section of the island is.
      It's a short walk to the lighthouse, still working to signal boats at sea.
      In 1942 British soldiers died at sea helping America defend our shores. Locals still honor them.  
      Part of a display at one of the small, local museums.
      More signage from the museum.
      I love any hand painted sign, especially when a skeleton becomes an arrow!
      I had the curried (local) shrimp with baby eggplant.
      Remember to look at your home not as someone who wants to move, but as someone who appreciates the best of what your location has to offer. Then, be sure that your home staging, as well as any literature emphasizes what's unique and remarkable about where you live.

      My $4.99 ebook, DIY Home Staging Tips to Sell Your Home Fast and For Top Dollar, helps you stage your home yourself, no matter where you live. You can download it now and start staging today to make your home that one that stands out from the competition.

      Quick Tips to Nailing Your Curb Appeal

      Monday, October 03, 2011
      By now everyone's aware of the importance of curb appeal.

      With competition strong for buyers' attention and most home searches beginning on the web, how the front of your home looks is more important than ever. It better stand above the comparable listings.

      How do you make your home more inviting than the others without hiring a landscape designer, a house painter, and a decorator to spruce up the exterior?

      You use these time-saving, labor-saving tips.

      Work smarter

      Reduce the amount of lawn you have by mulching wide around trees and shrubs.

      If mildew is a problem on your home's siding, use a garden sprayer and a product called Wet and Forget to clean it without the hassle of a pressure washer.

      Keep a broom handy near your front door but inside the house, and have a routine for giving the walls around the front door a sweeping. This is a good task to delegate to a member of the household. Include the walkway to your home if it collects leaves, papers, or other debris.


      If you don’t have a green thumb or can't be bothered with the mess, buy ready-made planters and hanging baskets at a local nursery, garden center, or greenhouse. 

      Reduce the decorative clutter in your front area. On a porch, instead of crowding it with multiple seats, planters, wreaths, flags baskets, and tables, opt for a bench and the simplest splash of colorful flowers (they don't have to be real).

      What fabric you do have should be clean, and not faded. A good investment is colorful pillows from discount stores. They will make an old chair new again. An even quicker refresh is wrapping last year's pillows with bright, new fabric. Just wrap, don't sew.


      If that old chair needs a facelift, spray it the same color is already is. A color change takes more paint and more time and a simple touchup with the spray can.

      If your porch flooring is not all that appealing, cover it with an outdoor rug.

      Have a system for maintaining flowers and plants. A routine for watering, deadheading, and fertilizing will simplify the chores and increase attractiveness.

      Have a reliable and economical source for seasonal plants. Know when to pull the spent springtime pansies and bring in the summer annuals, and when to yank those for the mums of fall.

      If your garage door needs a fresh coat of paint, well, painting an overhead garage door is easier than you think.


      Studies have shown that people don’t buy based on facts or price alone, but that their feelings and emotions also play a large part in their spending decisions. Capture their hearts from the curb!

      Your goal is to create an alluring and inviting space that entices home buyers to wonder, “Wow, if this is what the outside looks like, I can only imagine how fantastic the rest of the house must be.”

      For more tips on making your home ready for buyers, download my homestaging eBooks. Click the link for a rundown of what you'll learn, and a one-click way to order. You can start your staging today! 

      Is Your Mantel Decorated for Fall?

      Monday, September 26, 2011

      When your home is for sale, some seasonal touches help make the place look tended and freshened.

      The autumn season, no matter where you live seems to beg for natural props like leaves, vines, dried berries, and gourds.

      A fireplace is almost always a room's focal point. And the mantel is a wonderful place to showcase that room and the season, whether it's the pale green foliage of spring, the bright (silk) flowers of summer, the earth-toned harvest items of fall, or some glitzy props of Christmastime.  

      I assembled this mantel from autumnal kinds of things, some from the crafts store, some from my props closet, and some from the woodsy lot next door to my home.

      Fall colors are part of my favorite palette. But autumn doesn't have to be all about oranges, blacks and browns. White pumpkins are all the rage now, and gourds come in all kinds of colors.

      So, if your room, the one that houses your fireplace, is built around clear, cool colors like blueish pinks, pale lavender, icy greys, or blueish greens, you can still build a mantel around white and black, greens and browns, or variations on your color scheme.

      Someone got paint overspray on these glass grapes. 
      They look frosty, so I left them that way.
      The mantel I pulled together started with the grapevine wreath I made in about 15 minutes from wild vines I pulled down. It's about the easiest wall decoration in the world to make, and a great base for any seasonal staging prop. Of course, the craft and decor stores are full of them, in all shapes and sizes, but I'm too cheap thrifty to spring for a $20 wreath base. 

      I kept the wreath simple, hung it on the wall over the fireplace, and lined up my selected items on the narrow mantel. Then I adjusted them, until it all looked interesting and balanced.

      Since this home looked too sterile, I liked the 
      look of a wild and crazy wreath of natural vines.

      I wrote about five different formulas to stage a mantel in my eBook, DIY Home Staging Tips to Sell Your Home Fast and For Top Dollar. When you're tweaking a mantel staging, look for a variety of shapes and sizes. Make sure some of your items share a purpose, a color, or some other quality.

      I chose a group of my own terracotta flower pots to ground the mantel ledge. Then I added some orange and green flowers, some leftover vines, and gourds that must have cost all of five bucks at Michaels.

      My favorite pot was once glazed inside and out.
      Even though some of the flowers are dollar store, fake orchids, I thought the color was perfect for the grouping. All the gourds are Styrofoam because I can use them year after year. However, winter squashes, gourds, and pumpkins do paint up nicely.

      The other things I chose were the adorable, orange silk Chinese lantern flowers, the funky cluster of glass grapes, the little green and orange gourds, and, on the wreath, a cluster of silk grape leaves.

      I think the arrangement is festive without claiming too much attention in the room. It's perfect for a staged space -- simple and seasonal. If you haven't added some autumnal flourishes to your home, now's the time. Timely decor gives the impression that your home is new on the market. And home buyers are sure to notice that your home gets loving and attention year 'round.

      Popular Posts